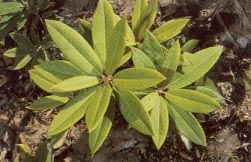
Rhododendrons and azaleas need their cultural requirements met. These requirements basically are:
I. Variety: The rhododendron or azalea must be suitable for the climate where it is planted. Some varieties are too tender for harsh winters, too tender for very hot weather or full sun, too sensitive to droughts or wet conditions. For specific problems, visit Cold Resistance, Sun & Shade, and Heat Tolerance. Select the variety for the location. Different varieties grow different heights. Some are tall, over 6', and some are dwarf, barely 12", and many are in between. Unfortunately, most rhododendrons never stop getting taller, but their height is quoted for plants that are 10 years old and by that time most varieties have slowed down their growth considerably. But if you choose plants that are the right size to begin with, they are relatively maintenance free. The American Rhododendron Society website has good charts for rhododendrons and azaleas giving the hardiness and height. Other very useful charts on the ARS website are the Proven Performer Lists that list the favorite rhododendron and azaleas plants for different parts of the US and Canada. The American Rhododendron Society has also applied quality ratings to most rhododendrons and azaleas that are commercially available. The scales run from 1 to 5 for the flower and also for the plant, where 5 is best for the flower and the plant. For example 4/3 has a rating of 4 for the flower and 3 for the plant. Many nurseries such as Greer Gardens publish these rating for all of their plants. Greer Gardens website has the most comprehensive list of descriptions and photos of rhododendrons and azaleas that are available in the trade.
II. Soil Drainage: Rhododendrons and azaleas thrive in moist, well-drained soils high in organic matter. Rhododendrons and azaleas have shallow fine silk-like roots. These roots do not tolerate water-saturated soil conditions but do require moist soils. Poor drainage and wet soils are problems often associated with heavy clay and compacted soil. To test drainage, dig a hole about 10 to 12 inches deep and fill it with water. Then after it drains, fill it with water again and see how long it takes to drain. If the hole drains within an hour you have good drainage. If the water has not drained out of the hole within four hours, the soil is poorly drained and you must correct the drainage problem before planting. Planting in raised beds is the best solution in heavy soils. Raised beds are built on top of the native soil to a depth of 12" to 18" and held in place with timbers or stones. Raised beds may require watering during the summer as they dry out faster. Moist well-drained soil is a must for most varieties. This sounds difficult, but it means to not let the soil dry out completely but don't get it too wet. Thoroughly water if necessary and then let it become almost dry. Most gardeners do this by planting in a well-drained area and mulching to hold the soil moisture in. Then, watering is seldom necessary except during long dry periods. Conditions that provide good drainage usually provide good aeration. However, aeration is sufficiently important that it must be emphasized. The soil must be aerated since the bacteria that make nutrients available to the roots require oxygen. For specific problems, visit Drainage, Aeration, Soil Mix, Watering.
III. Acid Soil: Rhododendrons and azaleas prefer acidic soils having a pH between 4.5 to 6.0. Rhododendrons and azaleas will let you know if the pH is not correct. If the leaves turn yellow between green veins then you most likely have a pH problem. If this occurs, a soil test is suggested for exact recommendations on adding a soil amendment to the soil in order to adjust the pH. Materials commonly used to lower soil pH are wettable sulfur or ferrous sulfate. Do not use aluminum sulfate to acidify the soil; it is toxic to rhododendron and azalea roots. Avoid planting azaleas near concrete sidewalks, driveways or foundations that may leach out lime which raises the pH. In rare cases, the pH may be too low. This is equally serious and must be rectified. The recommendation is usually to use dolomitic limestone. For specific problems, visit Soil Requirements and pH.
IV. Planting: Most rhododendron and azalea plants sold at nurseries and garden centers are sold in containers. These plants have a potentially serious problem when the roots reach the container and start circling inside the pot. They become pot bound or root bound. Before planting, these roots must be cut so they don't continue to grow and start strangling other roots. Many apparently healthy plants die when the roots start strangling each other. To prevent this, it is necessary to remove the plant from the container and examine their roots. If the plants appear pot-bound and have a thick, dense mat of fibrous roots along the surface of the root ball, use a knife to make vertical cuts about every 2 inches and 2 inches or more deep, equally spaced around the sides of the root ball. Then use your hands to gently loosen the roots where cuts were made and pull the roots outward. This process stimulates new root growth and allows water and nutrients to penetrate into the root mass. If the roots are not pot-bound, it is not necessary to slice them with a knife, but it is beneficial to loosen and pull them outward with your hands. When working with roots, make sure the plant is thoroughly watered. Any roots that dry out will die.
V. Fertilizing: When rhododendrons and azaleas are not planted in ideal locations they may develop chlorosis. Chlorosis is yellowing of a leaf between dark green veins. It is caused by malnutrition that can be caused by a wide variety of conditions. They include alkalinity of the soil, potassium deficiency, calcium deficiency, iron deficiency, magnesium deficiency, nitrogen toxicity (usually caused by nitrate fertilizers) or other conditions that damage the roots such as root rot, severe cutting of the roots, root weevils or root death caused by extreme amounts of fertilizer. In any case, a combination of acidification with sulfur and iron supplements such as chelated iron or iron sulfate will usually treat this problem. Holly-tone contains these elements and 4-6-4 fertilizer. It is best applied in the spring prior to blooming to make sure the plant is healthy when forming next year's flower buds. If you missed applying it in the early spring, it can be applied up until mid summer. Rhododendrons do best when left alone in the right conditions. You don't need to use Holly-tone or any fertilizer unless the plant shows signs of malnutrition. For specific problems, visit Fertilizing.
VI. Sun & Shade: Some shade is the best. Some varieties like full sun to bloom but others suffer from too much sun. This is a trial and error thing unless you know the variety and can look it up. More sun stimulates flowering and but may trigger lace bug infestations. Prune off lower branches of shade trees so that you have "high shade" above your rhododendrons. This is ideal for a healthy rhododendron bed. For specific problems, visit Sun & Shade and Shade & Sun Tolerant Rhododendrons.
VII. Mulching: Rhododendrons do best when they have about a 2" to 3" layer of mulch to hold in moisture, prevent weeds, and keep the roots cool. Since most mulches are organic, they need to be topped off periodically, usually about every year or two. Do not make the mulch over 3" thick. Keep the mulch about 3" to 4" back from the trunk/stem of the plants to avoid collar rot, bark split, rodent damage and providing shelter for weevils. Mulching does increase the risk of weevil damage. Do not use peat moss as a mulch. It is a soil amendment to be used when preparing the soil in a bed and can cause severe problems when used as a mulch including dehydrating the soil and preventing moisture from reaching the soil. It also tends to blow around. It is best to mulch with a 2-inch layer of an airy organic material such as wood chips, ground bark, pine needles, pine bark or rotted oak leaves. A year-round organic mulch will also provide natural nutrients and will help keep the soil cool and moist. For specific problems, visit Mulching.
VIII. Protection: In choosing a location to plant rhododendrons and azaleas, protection is very important. Protect from winter winds. This is especially true when the ground is frozen. Also protect from deer. I used deer netting in the winter and for plants that were susceptible to damage in the summer, such as deciduous azaleas, but have had to install deer fencing. For specific problems, visit Cold Resistance and Deer Protection.
IX. Propagation:Propagation of rhododendrons and azaleas is usually done by commercial nurseries, but is also successfully done many gardeners. There are several methods:
X. Cultural Problems: Most problems are cultural. Some tender rhododendron & azalea varieties are not suitable for growing outside green houses. Do not set new plants any deeper than the original soil level. Ensure the root collar is exposed and free of soil and mulch. Rhododendrons and azaleas are subject to collar rot when root flares are buried. When planting in poorly drained soils create raised beds or provide sub-surface drainage. Plant with the root collar exposed. If soil is compacted, prepare planting area by cultivating and incorporating organic matter. Cultivating rhododendrons and azaleas must be avoided. They have shallow roots and the roots will be severely damaged by cultivating. Weed killer from weed & feed products is a serious problem also. Salt from sidewalks in the winter is also a killer of rhododendron and azaleas. Soil near concrete or mortar such as foundations and walks is usually alkaline (not acidic) and a problem. Lawn fertilizer is not good for rhododendrons. Any fertilizer after mid-summer can set rhododendron & azaleas way back. Another problem is the roots of walnut trees. They emit a chemical that is toxic to rhododendrons, azaleas and many other kinds of plants. For specific problems, visit Common Problems and Their Solutions.
Transplanting: Move plants that are planted in the wrong location. Some rhododendrons like more sun and some like more shade. If you didn't note this before planting, the plants may be struggling and should be moved to a better location. Rhododendrons are easy to move. They have shallow roots. Don't place the rhododendrons close to shallow-rooted trees such as maple, ash or elm. Feeder roots from such trees rapidly move into improved soil and compete for water and plant food. When transplanting a large plant several steps should be followed.
First, it is best to stimulate a tight root ball by root pruning the plants to be moved about a year before moving. This is accomplished by cutting a circle around the plant stem with a shovel to cut off roots that extend beyond this point. This radius is usually slightly smaller than half way to the drip line.
Second, it is best to move when the plant is dormant and not stressed. This would be in the spring and fall when the plant is still dormant but the soil is not frozen. Moving in the fall before the ground freezes is preferable if you don't have a problem with frost heaving. Sometimes winter freezing and thawing cycles can actually lift a transplanted plant out of the ground where the roots are then desiccated and the plant dies. For this reason, it is safer to transplant in the spring after the ground thaws in climates where frost heaving is a problem.
Third, take precautions to preserve the integrity of the root ball. Tie the ball together and support is so it doesn't fall apart. The very safest approach is to dig a trench up to 12 inches deep, around the drip-line of the plant. Then undercut the plant to form a cone, removing the soil an inch or so at a time, moving all around the plant, until you begin to see that you are removing roots. If possible, then get a square of burlap under the plant. Tilt the plant to one side, put one edge of the burlap close to the center of the plant, wadded up so that only half of it is on the open side of the plant, then rock the plant the other way and pull the burlap through. Tie the corners of the burlap to each other across the plant. Tie the burlap tightly to keep the soil around the plant roots undisturbed. Then lift the plant by the burlap and the bottom, not by its stems.
Finally, pruning the top helps match the demands of the top to the capability of the roots after they are stressed by the move. People have been known to cut the top off wild rhododendrons before moving and the plants have come back with superior shape. This is drastic and not recommended for a plant you don't want to risk loosing. Rhododendrons and azaleas have dormant buds beneath the bark, which sprout to form new growth after severe pruning, hence severe pruning, which removes 1/3 to 1/2 of leaf area, is quite common when transplanting.
Make sure you watch the plant after it was moved like you would a new plant. Its roots are compromised and it will need a reliable source of moisture. Also using a anti-transpirant such as Wilt-Pruf will help prevent desiccation . If the weather has a dry spell, make sure you water any newly planted rhododendrons, large or small. For specific problems, visit Transplanting.
All rhododendrons and azaleas will grow well in light shade. Most rhododendrons including the Carolina rhododendron will bloom more abundantly in full sun if the soil is kept moist, but sunscald and winter desiccation problems may cause foliage and bud problems. More sun stimulates flowering and but may trigger lace bug infestations. In hot climates or in windy places partial shade is usually mandatory. Also, full sunlight tends to bleach the flowers. In cold climates, most rhododendrons do better on the north side of a building or on a northwest slope where they receive summer sun but protection from the winter sun. All rhododendrons and azaleas need some sun for best flowering but in general require partial shade. These requirements vary between varieties and also vary in different climatic zones.
Flowering: Rhododendrons and azaleas usually won't flower well if planted in dense shade such as under trees with dense foliage, such as maples, beeches, and pines. Plant in the diffused light under widely spaced, high-crowned trees like oaks and tulip poplars. Prune off lower branches of shade trees so that you have "high shade" above your rhododendrons. This is ideal for a healthy rhododendron bed.
Sun Tolerance: In the southern USA where sun tolerance is a greater requirement, the most popular plants are azaleas, especially in the Southeastern states. However, in Oklahoma, some growers have been successful growing rhododendron iron-clads. Though iron-clads are most noted for their winter hardiness, some also exhibit good sun tolerance and heat tolerance. For descriptions and photos of Shade & Sun Tolerant Rhododendron, see Shade & Sun Tolerant Rhododendrons.
Heat Tolerance
Heat Tolerance: The American Horticultural Society has created aHeat Zone Map. This is helpful in determining if a plant grown in one area may have heat tolerance challenges in a different area. It helps explain why some plants will not do well in certain regions.
One problem in growing rhododendrons in hot climates is root rot. Many rhododendrons are quite susceptible to root rot, especially when soil temperatures get higher. In areas with cool nights, one can keep soil temperatures down with shade and mulch. In areas where cool nights are not common, this won't work. We must remember also that too much shade causes a poor flower bud set on many varieties.
The quest for heat tolerant rhododendrons has focused on the very heat tolerant Rhododendron hyperythrum. This species has been used in hybridizing a number of heat tolerant offspring, including R. 'Hypermax' (R. hyperythrum x R. maximum), R. 'Charles Loomis' ('English Roseum' x R. hyperythrum), R. 'Peppermint Twist' (R. hyperythrum x R. Hexe) and R. 'Michelle Smith' (R. 'Scintillation' x R. hyperythrum)
Other varieties known for their heat tolerance include: 'Aunt Martha', 'Blue Jay', 'Blue Peter', 'Boule de Neige', 'Brilliant', 'Chapmanii Wonder', 'Cynthia', 'English Roseum', 'Evening Glow', 'Goldsworth Orange', 'Lady Clementine Mitford', 'Mrs. Charles E. Pearson', 'Myrtifolium', 'Odoratum', 'PJM', 'Platinum Pearl', and 'Red Eye'. Among this list are eight are also sun and cold tolerant: 'Aunt Martha' (-10F), 'Blue Jay' (-10F), 'Blue Peter' (-10F), 'Boule de Neige' (-25F) , 'Cynthia' (-15F), 'English Roseum' (-25F), 'Myrtifolium' (-15F), and 'PJM' (-25F).
Plant Cold Hardiness: A study in New England determined that a plants hardiness rating varies by about 10 degrees from winter to winter. A decrease in hardiness is usually caused by warm spells followed quickly by very cold spells. The hardiness rating that is reported is usually the lowest temperature a plant has been known to survive without damage. In the real world, the actual capability may be 10 degrees warmer than that some years. Some rhododendrons can tolerate severe winter conditions while others cannot. There are two problems from cold:
1) cellular damage caused by freezing when plant is not hardened off properly or is too tender a variety for the temperature. To harden off properly a plant must be allowed to go dormant in the fall. New growth is the most susceptible. This means that fertilizers containing nitrogen shouldn't be applied after mid summer since nitrogen fertilizers encourage new growth. If the weather is warm in the fall before early frosts, this is an ideal time to see freeze damage. The two photos to the right show examples of severe freeze damage and mild freeze damage. [Photos are courtesy of Harold Greer]
2) desiccation of the foliage when the ground is frozen and sun and wind attack the leaves. There are four solutions:
cold-resistant varieties of plants
winter windbreaks
winter sun shade
chemical antitranspirants & antidesiccants
Cold Hardiness Zones: In catalog listings, the cold resistance of a hybrid rhododendron is usually indicated by a code that indicates the lowest temperature the flower buds can tolerate during the winter and still open perfectly in the spring. The US Department of Agriculture introduced Plant [Cold] Hardiness Zones in 1960 to classify the cold hardiness required of plants in certain areas. Prior to USDA Zone system, there was an international cold hardiness rating system for rhododendrons, which ranged from H-1 to H-5. Plants bearing the code designation H-1 do well down to -25°, H-2 to -15°, H-3 to -5°, H-4 to 5°, H-5 to 15°, H-6 to 25° and H-7 to 32°. Most varieties grown in the USA range between H-1 and H-4 in hardiness. Many catalogues use to the USDA cold hardiness zones. Zone 4 corresponds to H-1, Zone 5 to H-2, Zone 6 to H-3, Zone 7 to H-4, Zone 8 to H-5, etc. Other factors are important. If your plants are subject to desiccating sun and wind in the winter or warm spells in winter that may compromise a plants dormancy, then you should probably use plants that are one zone hardier. For example, I live in Zone 6, H-3, but try to use plants that are good for Zone 5, H-2. Plants with an H-2 rating may need winter protection.
There is a third cold hardiness zone system developed by Sunset Magazine for 13 states in the Western US. It is completely different and tries to divide the West into 24 plant zones. If you are using a Sunset Magazine garden book then you will have to become familiar with this system. That is about the only place it is used. Apparently, even though the climate zones were established by the University of California Cooperative Extension, the Sunset Magazine climate zone map is copy written so it was never intended to be used outside Sunset Magazines own publications.
Winter Wind: Rhododendrons may be harmed in winter by drying winds and bright sun; protect their shallow roots with a mulch of oak leaves or pine needles and their foliage with a loose blanket of evergreen boughs or specially built screens. Such screens must provide shade without capturing heat. A burlap screen will protect a plant while a black or clear plastic bag will cook a plant. Keep the mulch away from the trunk of the plant. This avoids bark split, collar rot, and rodent damage.
Antitranspirants: Chemical antitranspirants effectively cover the stomata, the pores through which the leaves loose moisture. However they must be designed to naturally degrade so they don't interfere with the normal operation of the stomata during the growing season. This usually means the antitranspirants need to be applied at least twice during the winter, but not too close to the growing season.
Dormancy: To insure that a plant has the ability to make it through the winter, it must be dormant. Dormancy is a normal process in which the plant goes into a rest state during the winter. Dormancy is caused by a number of things including short days, low temperatures and drought. Several things can break or prevent dormancy.
Too much nitrogen fertilizer after mid summer will keep a plant in a growth state when it should be going into dormancy.
Warm weather spells during the winter can break dormancy in a plant that has gone dormant.
Drought can cause dormancy and when the drought breaks, dormancy can break also.
A warm fall followed by a sudden winter, can expose a plant to the cold before it has gone dormant.
Too much light such as being planted under a spot light that is kept on all night.
The most important factor in achieving vigorous growth is an acid soil mixture high in organic content. Rhododendrons and azaleas need an acid soil with a pH of 4.5 to 6.0, well mulched with organic material. Rhododendrons thrive in a moist, well-drained, humus-filled soil, enriched with peat moss or leaf mold. You only need to amend the soil if it is devoid of organic matter or if the pH is too high. Have a soil test done by your local extension service to determine if something needs to be added. Well-decayed organic matter dug into the top layer of soil is helpful for retaining moisture and preventing compaction. For organic matter you can use loam, coarse sand and ground oak leaves or sphagnum peat moss. Many commercial growers root rhododendrons and azaleas in pure sphagnum peat, or in a 50-50 mixture of sphagnum peat and coarse sand or perlite. A favorite mixture on the West Coast is 1/2 sphagnum peat and 1/2 ground bark dust, but in such mixtures, plants must be fed regularly. My favorite soil mix is a 50-50 mix of peat humus and the natural soil. Soil around the rhododendron's shallow roots must be kept cool and moist but well drained.
Sphagnum peat or peat moss is a super soil amendment. Researchers claim that plants planted in mixes containing sphagnum peat will resist disease better. The sphagnum peat in the soil does regulate the availability of water so the roots are not too wet, but also the sphagnum is said to provide protection against disease.
Drainage: Rhododendrons and azaleas thrive in moist, well-drained soils high in organic matter. Rhododendrons and azaleas have shallow fine silk-like roots. These roots do not tolerate water-saturated soil conditions but do require moist soils. Poor drainage and wet soils are problems often associated with heavy clay and compacted soil. To test drainage, dig a hole about 10 to 12 inches deep and fill it with water. Then after it drains, fill it with water again and see how long it takes to drain. If the hole drains within an hour you have good drainage. If the water has not drained out of the hole within four hours, the soil is poorly drained and you must correct the drainage problem before planting. Planting in raised beds is the best solution in heavy soils. Raised beds are built on top of the native soil to a depth of 12" to 18" and held in place with timbers or stones. They are made with a good rhododendron and azalea soil mix. Raised beds may require watering during the summer as they dry out faster.
Aeration: Conditions that provide good drainage usually provide good aeration. However, aeration is sufficiently important that it must be emphasized. The soil must be aerated since the bacteria that make nutrients available to the roots require oxygen. Plants in heavy soils with poor aeration often become chlorotic from malnutrition. Heavier clay soils should be amended with organic matter and sand before planting. Add coarse sand to your soil as the large sand particles allow for better drainage and aeration. Avoid fine-grained builders sand and play sand. For the clay soils of Ohio, Holden Arboretum recommends a soil mix of five parts coarse sand and one part pine bark to four parts of the existing soil.
Soil Mix: Up to half of the planting medium should be organic material. Combinations of sphagnum peat moss, pine bark fines, compost, and aged, chopped leaves should be worked into the soil to a depth of about 12". Oak leaves are excellent. Make sure there are no walnut tree roots or leaves in the soil. All parts of walnut trees are toxic to rhododendrons and azaleas. Pine bark is particularly good because substances in the pine bark are thought to inhibit fungi that cause root rot. Inorganic materials that may also be added to soil include course sand, perlite and vermiculite. Sandy soils need more organic matter. Clay soils need both sand and organic matter. Adding a large amount of organic matter and sand will raise the bed, which will also improve the drainage and aeration of the soil.
Soil pH: Soil pH is a measure of the acidity of soil in terms of activity of hydrogen ions (H+). Since the pH is actually the magnitude of a negative exponent, a smaller number means more acid. A pH of 7 is neutral, while a pH of 0 is strongly acidic and 14 is strongly alkaline. One way of determining pH in native soils is to observe the predominant plants. Calcifuge plants (those that prefer an acidic soil) include Erica, Rhododendron and nearly all other Ericaceae species, many Betula (birch), Digitalis (foxgloves), gorse, and Scots Pine. Calcicole (lime loving) plants include Fraxinus (Ash), Honeysuckle (Lonicera), Buddleia, Cornus spp. (dogwoods), Lilac (Syringa) and Clematis spp. The mophead hydrangea (Hydrangea macrophylla) produces pink flowers at pH values of 6.8 or higher, and blue flowers at pH 6.0 or below. pH is not constant in soil or water, but varies on a seasonal or even daily basis due to factors such as rainfall, biological growth within the soil, and temperature changes. Slightly acidic soils (pH ~6.5) are considered most favorable for overall nutrient uptake. Such soils are also optimal for nitrogen-fixing legumes and nitrogen-fixing soil bacteria. Some plants are adapted to acidic or basic soils due to natural selection of species in these conditions. Rhododendrons and azaleas prefer soils with a pH of 4.5 to 6.0. Potatoes grow well in soils with pH <5.5. Blueberries and cranberries grow well in even more acidic soils (<4.5) . Many farm crops including sugar beets, cotton, kale, garden peas, and many grains and grasses grow well in alkaline soil (>7.5). A soil test, available for a nominal fee through your local county Extension office, will determine the pH and nutrient content of your soil and provide recommendations for fertilizer. When grown in soils having a pH above 6.0, plants may appear anemic when certain nutrients such as iron become deficient.
Pounds of elemental sulfur needed
to lower soil pH of a silt loam soil
to a depth of 6 inches*.
Present
Desired soil pH
pH
6.5
6.0
5.5
5.0
4.5
- - lb. of elemental sulfur per 100 sq. ft. - -
8.0
3.0
4.0
5.5
7.0
8.0
7.5
2.0
3.5
4.5
6.0
7.0
7.0
1.0
2.0
3.5
5.0
6.0
6.5
---
1.0
2.5
4.0
4.5
6.0
---
---
1.0
2.5
3.5
*For sandy soils, reduce amount by
1/3; for clay soils, increase amount
by 1/2; do not use aluminum sulfate.
Note: 1 lb. per 100 sq.ft. is equivalent to 4.5 grams per sq. ft. One tablespoon is 12 grams.
Courtesy of: University of Illinois
If the soil is too alkaline, acidity may be increased by adding flowers of sulfur (powdered sulfur) or iron sulfate. I add 1 tablespoon of sulfur powder around the base of any plant showing signs of chlorosis. Around established rhododendrons and azaleas, do not disturb the shallow roots. Sprinkle the sulfur under the mulch and then replace the mulch. Do not use aluminum sulfate. Aluminum can build up in the soil to toxic levels eventually. One very common source of chlorosis is when lime leaches out of concrete, such as from a foundation or walkway, making the nearby soil more alkaline. This problem decreases each year as the concrete ages. An annual application of sulfur can compensate for this problem. Ammonium sulfate has a very small effect to lower pH. For example ammonium sulfate fertilizer 21-0-0 at 10 lbs. per 1000 square feet can change the soil pH from 7.5 to 7.4. Do not use more than is listed for fertilizer needs.
Iron sulfate can be used to lower pH but requires six times more product than elemental sulfur. It reacts faster at 3-4 weeks than elemental sulfur but as with all the products can cause plant damage if over used.
Do not use Aluminum Sulfate: Aluminum sulfate will change the soil pH instantly because the aluminum produces the acidity as soon as it dissolves in the soil. However aluminum sulfate should be reserved for use only with hydrangeas to promote blue flowers. Aluminum is necessary for the flower color change in hydrangeas but can cause aluminum toxicity in other plants such as blueberries, rhododendrons and azaleas. Many acres of land in the world are unusable for crops due to soil acidity and aluminum toxicity. Simply lowering the soil pH with any product will help hydrangeas flowers to be blue but the competitive deep blue will require aluminum sulfate additions.
If you Google "aluminum sulfate rhododendron azalea" you will find some extension agents still recommending aluminum sulfate while most are warning against using it. It is sad that such bad advice is still being given.
Never use aluminum sulfate for making the planting medium more acid. Thousands of azaleas and rhododendrons are killed each year by the addition of aluminum sulfate to planting mediums. Aluminum ions under very acid conditions are very toxic to all of the rhododendron genus.
Aluminum is not considered to be an essential element for plant growth. In fact, for most plants, high levels of available soil aluminum are toxic causing stunting of root growth and eventual death if soil aluminum is high enough. Usually the soil pH has to be less than 4.5 for this to happen. Rhododendrons and azaleas are more vulnerable than many other plants.
Although aluminum sulfate is often recommended to gardeners for increasing the acidity of the soil, it has a toxic salt effect on the roots of plants if it is used in large amounts. Small amounts do not cause much of an effect. About 7 lb. of aluminum sulfate are required to accomplish the same effects as one lb. of sulfur.
The one area where aluminum sulfate is recommended is in making blue hydrangeas blue. The chemistry of hydrangeas is such that not only acidity is necessary, but also aluminum ions are also necessary to make the flowers blue due to the aluminum binding with the anthocyanin. Hence, blue hydrangeas shouldn't share the same beds with rhododendrons and azaleas. Over application of aluminum sulfate can be toxic even to hydrangea.
I am sure that part of the reason for the bad advice is that aluminum sulfate is very quick in modifying the soil pH. Sulfur is very slow, but is much more effective eventually.
Guy Nearing was one of the first to realize that aluminum sulfate was detrimental to rhododendrons and azaleas. His findings were published in the Journal of the ARS in 1955.
Today, the effect is thoroughly understood. The most eloquent article on adjusting soil pH for rhododendrons and azaleas was written by Sandra Mason with the University of Illinois, Champaign, slmason@uiuc.edu.
In her words, "Many acres of land in the world are unusable for crops due to soil acidity and aluminum toxicity."
Keep Moist: Rhododendrons and azaleas will not survive in wet, poorly-drained soil. Although too much water can injure the roots it is important that they receive adequate moisture, especially during the first year after transplanting. A reason a well-drained soil is important is so that adequate water can be used while still maintaining adequate aeration. A two to three inch layer of organic mulch surrounding the plant will help retain moisture while allowing for good drainage.
Bed Preparation: Because the roots grow typically within 2 or 3 inches of the surface, a bed prepared especially for rhododendrons and azaleas need not be more than 12 inches deep; deep planting or too much mulch in the growing season keeps the roots from getting the air they need. In fact, it is a good idea to set rhododendrons about 1 inch higher than they grew at the nursery. Do not set new plants any deeper than the original soil level. Ensure the root collar is exposed and free of soil and mulch. Rhododendrons and azaleas are subject to collar rot when root flares are buried. When planting in poorly drained soils create raised beds or provide sub-surface drainage. Plant with the root collar exposed. If soil is compacted, prepare planting area by cultivating and incorporating organic matter. Balled-and-burlapped plants may be planted while in blossom but it is better to transplant them when they are dormant.
When to Plant: Whether to plant in spring or fall is always a question. Fall planting is best because it is less stressful to the plant than spring and summer planting. During the fall, temperatures are cooler and plants are going dormant. As top growth decreases, there is less demand on the roots for water and nutrients. Roots continue to grow and become established throughout the fall and winter months, however, even when the top is dormant. By spring, the well-established roots are ready to support new growth and flowers.
Moisture: When the shallow root system can't take in all the water it may need to survive such as during a summer dry spell, this can spell disaster. Do not allow the roots to dry out, but good drainage is essential also. Mature plants are much hardier and Mother Nature seems to take good care of them under normal conditions. Care for new plants for 2-3 years to help them get established. One problem with fall planting is that it makes a plant more susceptible to frost heave in climates where freezing and thawing cycles are common. In that case, rhododendrons are best planted in the spring. It must be noted that maintaining the proper moisture level in the summer is more difficult after spring planting.
Buying Plants: When buying plants in the fall, it is risky to buy potted plants or balled-and-burlapped plants that were in a garden center all summer. It is best to buy field grown plants that are freshly dug. However, most plants are purchased in the spring when they are in bloom. Just be advised that this is the least favorable time to plant them. Most will be OK if planted properly and carefully watched during the heat of the summer, but the rate of loss is higher. Return to Top
Preparing the Hole
Rhododendrons and azaleas will not survive in wet, poorly-drained soil. Avoid planting them in depressions where water may puddle after rain or near downspouts where they experience wet/dry fluctuations in soil moisture. Dig a hole about 10 to 12 inches deep and fill it with water. Then after it drains, fill it again and see how long it takes to drain. If the hole drains within an hour you have good drainage. If the water has not drained out of the hole within one hour, the soil is poorly drained and you must correct the drainage problem before planting. Install a perforated pipe or drain tile in the garden, making sure that the outlet is lower than the bottom of the planting hole, or build raised beds.
Turn the soil well and dig a hole two or three times as wide as the root ball. Add plenty of organic material, remove the plant from its container and loosen the root ball. Water the pot thoroughly before planting and tease the soil away from the roots on the outside of the pot. Don't worry about injuring the roots it's more important to remove a significant amount of the potting soil than it is to keep every root intact. Planting depth is critical because azaleas are shallow-rooted plants. In sandy soils, set the root ball in the hole so the top is about 1 inch above the surrounding soil grade. In clay soils and poorly drained soils, place the top of the root ball 2 to 4 inches above the soil grade, gradually sloping the soil to meet the original grade. This allows for settling and assures that the roots will be in the upper layer of soil where they can readily obtain oxygen, water and nutrients.
Set the root ball into your prepared hole (making sure the top 1-2 inches of the ball is above the soil level), pull in your humus/organic soil around the plant, pack firmly and cover with mulch. Do not set new plants any deeper than the original soil level. Ensure the root collar is exposed and free of soil and mulch. Rhododendrons and azaleas are subject to collar rot when root flares are buried. When planting in poorly drained soils create raised beds or provide sub-surface drainage. Plant with the root collar exposed. If soil is compacted, prepare planting area by cultivating and incorporating organic matter. Finally, water the whole area thoroughly and apply a thin layer of shredded leaves, pine needles, or pine bark to keep the soil cool and moist. Water your newly planted rhododendron or azalea weekly if the weather is dry, at least for the first year.
If drainage is fairly good, use a 4 to 6 inch hole and mound 4 to 6 inches.
For poor drainage or if high pH is a serious problem, use a 8 to 12 inch mound on top of soil.
Raised Beds: Rhododendrons and azaleas need three things, acidic soil, drainage and drainage. If the soil is poorly drained or alkaline, a raised bed may be the best option. Rhododendrons and azaleas have shallow roots, so the raised bed only needs to be 6 to 12 inches above grade. Create it by creating a mound or berm, or a raised planting bed using a retaining curb such as logs, timbers or rocks. It is best if the base is a material with good drainage like gravel. Then at least 6 of 8 inches of good acidic, well-drained soil above that. If you use a lot of peat moss or compost remember, the peat moss and compost will decompose over time to 1/2 the original depth, so make the bed proportionately higher. [Sketch courtesy of Harold Greer]
When preparing new raised beds in soil that is not acidic, the pH may be lowered by adding flowers of sulfur (powdered sulfur). Amounts of powdered sulfur needed to lower the pH of a silt loam soil to a 6-inch depth are given in the table above. A target pH of 5.5 is ideal for most rhododendrons and azaleas. Sandy soils would require less and clay soils would require more. Elemental sulfur is converted to sulfuric acid by soil bacteria. Therefore, in order for sulfur to work the following must be satisfied:
Sulfur must be mixed with the soil to provide contact. (Around established rhododendrons and azaleas, do not disturb the shallow roots. Sprinkle the sulfur under the mulch and then replace the mulch.)
The soil must be moist
The soil must be aerated (bacteria need oxygen).
The soil must be warm for rapid bacterial growth.
Time is required for the reaction to go to completion. Return to Top
The best way to buy plants is with a root-ball that is covered with burlap. Most rhododendron and azalea plants sold at nurseries and garden centers are sold in containers. These plants have a potentially serious problem when the roots reach the container and start circling inside the pot. They become pot bound or root bound. Before planting, these roots must be cut so they don't continue to grow and start strangling other roots. Many apparently healthy plants die when the roots start strangling each other.
Remove from pot. Lay on side. Make deep X cuts in from side & bottom.
To prevent this, it is necessary to remove the plant from the container and examine their roots. If the plants appear pot-bound and have a thick, dense mat of fibrous roots along the surface of the root ball, use a knife to make vertical cuts about every 2 inches and about 2 inches deep, equally spaced around the sides of the root ball. Then use your hands to gently loosen the roots where cuts were made and pull the roots outward. This process stimulates new root growth and allows water and nutrients to penetrate into the root mass. If the roots are not pot-bound, it is not necessary to slice them with a knife, but it is beneficial to loosen and pull them outward with your hands. When working with roots, make sure the plant is thoroughly watered. Any roots that dry out will die.
If the plant has been transplanted several times it may be necessary to remove all soil so that previous areas that were pot bound in side the root ball when it was planted in smaller containers my be exposed. All roots must be separated so the only go in one direction and do not circle. Those that cannot be straightened must be cut. If allowed to circle other roots, they will strangle the other roots as they grow larger. When working with bare roots of a plant, keep them moistened. Any roots that dry out will die. Return to Top
Planting Balled-And-Burlapped Plants
When planting balled-and-burlapped plants, if you are not sure the burlap is natural and not treated, remove the burlap. In years past, a natural burlap was used that would rot in the soil. Today, preservatives are added to the burlap to make it last longer. This hampers root growth and may lead to the early demise of a plant. If you do get a plant with natural burlap, then make sure you loosen the burlap and push it down as far as you can into the hole. If it comes to the surface, it will wick moisture out of the ground. Before planting, make sure you soak the root ball about an hour. A dry root ball is difficult to re-wet once it is in the ground. To plant a balled-and-burlapped plant:
loosen the burlap and inspect the roots. If the roots are circling, then prune as described above.
prepare the hole so the top of the root ball will be about an inch higher than the surrounding soil.
use the burlap to carry the plant to the hole and set it in place.
carefully remove the burlap by carefully sliding it from under the plant unless it is natural burlap. In that case, make sure you push the burlap as far down into the hole as you can.
refill the hole around the root ball with a mixture of native soil and organic matter.
cup the soil around the plant so that it will form a puddle when watering.
keep watered for several weeks.
when weaning from watering, wait until some wilting starts to occur before watering.
when watering is no longer required, mulch the plant, but keep the mulch 2 or 3 inches away from the "trunk".
Planting Containerized Plants
Before planting, make sure you soak the root ball about an hour. A dry root ball is difficult to re-wet once it is in the ground. When planting containerized plants:
prepare the hole so the top of the root ball will be about an inch higher than the surrounding soil.
carefully support the roots while moving the plant to the hole and setting it in place.
refill the hole around the root ball with a mixture of native soil and organic matter.
cup the soil around the plant so that it will form a puddle when watering.
keep watered for several weeks.
when weaning from watering, wait until some wilting starts to occur before watering.
when watering is no longer required, mulch the plant, but keep the mulch 2 or 3 inches away from the "trunk".
Follow-up: Do not fertilize at the time of planting, as this might injure the roots, but water deeply. Also, if newly purchased plants have little white BB-like balls in its container don't even think of fertilizing for a while. The little balls are fertilizer and those plants have been pushed to the hilt. Plant them as soon as possible and let them adjust. Plants that have been given a soil mixture rich in organic matter probably will not need feeding for several years. Wait until the plants are established before fertilizing them.
Apply 3 to 4 inches of an organic mulch such as pine straw, pine bark mini-nuggets or shredded leaves on the surface. Use your hands to pull the mulch away from the trunk 2 or 3 inches. This helps keep the trunk area dry and reduces the chances of wood decay. It also discourages rodents from gnawing on the trunk and prevents bark split. Organic mulches gradually decompose and provide nutrients to the plants.
Whether the plant was balled-and-burlapped or potted, make sure that the plant is getting wet. As mentioned in the previous section, rhododendron guru Harold Greer noted: "Quite often a plant will get completely dry and then no matter how much water you apply, the rootball will just keep shedding it. The top of the soil may seem wet, and the soil around the plant may even be very wet, but the actual rootball of the plant is bone dry. This is especially true for newly planted rhododendrons, and it is the major reason for failure, or at least less than great success with that new plant. It is hard to believe that a plant can be within mere inches of a sprinkler that has been running for hours and still be dry, yet it can be SO TRUE!"
This is caused by not opening up and spreading out the roots before planting and then thoroughly soaking the soil after planting. When this happens, it is best to dig the plant up and make sure that the root ball is not dry. Then replant with the roots properly spread out and lots of drainage. That may mean using a raised bed. Never let the roots dry out when planting or transplanting. It doesn't hurt to dip them in muddy water before planting. It is best to water deeply once in a while rather than watering a lightly all the time. I try to check my new plants once a week or a week after any decent rain.
Most rhododendron and azalea plants sold at nurseries and garden centers are "hardy", grown to be planted outdoors in the climate of the nursery or garden center. These plants are usually quite easy to transplant but some precautions are important to insure success.
Because the roots grow near the surface, a bed prepared especially for rhododendrons and azaleas need not be more than 12 inches deep; deep planting or too much mulch in the growing season keeps the roots from getting the air they need. In fact, it is a good idea to set rhododendrons about 1 inch higher than they grew at the nursery. Do not set new plants any deeper than the original soil level. Ensure the root collar is exposed and free of soil and mulch. Rhododendrons and azaleas are subject to collar rot when root flares are buried. When planting in poorly drained soils create raised beds or provide sub-surface drainage. Plant with the root collar exposed. If soil is compacted, prepare planting area by cultivating and incorporating organic matter. Balled-and-burlapped plants may be transplanted in blossom but it is better to transplant them when they are dormant.
Whether to transplant in spring or fall is always a question. Fall is normally the best time because roots on a new plant need help establishing themselves. The shallow root system can't take in all the water it may need to survive and a drought can spell disaster. Water them frequently in the morning. Mature plants are much hardier and Mother Nature seems to take good care of them under normal conditions. Care for new plants for 2-3 years to help them get established. One problem with fall transplanting is that it makes a plant more susceptible to frost heave in climates where freezing and thawing cycles are common. In that case, rhododendrons transplant best in the spring. It must be noted that maintaining the proper moisture level in the summer is very difficult after spring transplanting. Make sure you watch the plant after it was moved like you would a new plant. Its roots are compromised and it will need a reliable source of moisture. If the weather has a dry spell, make sure you water any newly planted rhododendrons, large or small.
Make sure that the plant is getting wet. Rhododendron guru Harold Greer noted: "Quite often a plant will get completely dry and then no matter how much water you apply, the rootball will just keep shedding it. The top of the soil may seem wet, and the soil around the plant may even be very wet, but the actual rootball of the plant is bone dry. This is especially true for newly planted rhododendrons, and it is the major reason for failure, or at least less than great success with that new plant. It is hard to believe that a plant can be within mere inches of a sprinkler that has been running for hours and still be dry, yet it can be SO TRUE!".
Some rhododendrons like more sun and some like more shade. If you didn't note this before planting, the plants may be struggling and should be moved to a better location. Rhododendrons have shallow roots; they are easy to move.
The photo below shows how the Rhododendron Species Foundation moved an 8 to 9 foot tall rhododendron. Note how thin the root mass is, only about 5 inches thick. Most people don't use shipping pallets but do use a tarp to slide a large rhododendron to its new location.
When transplanting a large plant several steps should be followed.
First, it is best to stimulate a tight root ball by root pruning the plants to be moved about a year before moving. This is accomplished by cutting a circle around the plant stem with a shovel to cut off roots that extend beyond this point. This radius is usually slightly smaller than half way to the drip line.
Second, it is best to move when the plant is dormant and not stressed. This would be in the spring and fall when the plant is still dormant but the soil is not frozen. Moving in the fall before the ground freezes is preferable if you don't have a problem with frost heaving. Sometimes winter freezing and thawing cycles can actually lift a transplanted plant out of the ground where the roots are then desiccated and the plant dies. For this reason, it is safer to transplant in the spring after the ground thaws in climates where frost heaving is a problem.
Third, take precautions to preserve the integrity of the root ball. Tie the ball together and support it so it doesn't fall apart. The very safest approach is to dig a trench up to 12 inches deep, around the dripline of the plant. Then undercut the plant to form a cone, removing the soil an inch or so at a time, moving all around the plant, until you begin to see that you are removing roots. If possible, then get a square of burlap under the plant. Tilt the plant to one side, put one edge of the burlap close to the center of the plant, wadded up so that only half of it is on the open side of the plant, then rock the plant the other way and pull the burlap through. Tie the corners of the burlap to each other across the plant. Tie the burlap tightly to keep the soil around the plant roots undisturbed. Then lift the plant by the burlap and the bottom, not by its stems.
If the plant is very large it is important to dig a wide root ball. Don't worry about digging deep into the soil since most azalea & rhododendron roots are near the surface. Dig the plant, preserving a root ball as wide as can be safely moved. You can lift it onto a tarp and then use the tarp to drag the plant to its new location rather than picking it up. Be sure not to plant too deeply and water it thoroughly after transplanting.
Finally, pruning the top helps match the demands of the top to the capability of the roots after they are stressed by the move. People have been known to cut the top off wild rhododendrons before moving and the plants have come back with superior shape. This is drastic and not recommended for a plant you don't want to risk loosing. Rhododendrons and azaleas have dormant buds beneath the bark, which sprout to form new growth after severe pruning, hence severe pruning which removes 1/3 to 1/2 of leaf area is quite common when transplanting. Make sure you watch the plant after it was moved like you would a new plant. Its roots are compromised and it will need a reliable source of moisture. If the weather has a dry spell, make sure you water any newly planted rhododendrons, large or small.
People often ask, can I plant my Mother's Day azalea (or other gift plant purchased from a florist) outdoors.
Greenhouse Azaleas: Florist Azaleas, and other greenhouse azaleas which are forced to bloom for special holidays, are varieties hybridized to be easy to propagate and easy to force into bloom at a precise time and with very showy foliage and flowers that tend to hold well. In most climates they do not do well outdoors and are considered to be houseplants.
Garden azaleas are species or varieties that are hybridized to not force easily since they can be faked out by unseasonable weather and sport which destroys the seasonal bloom. They are also selected or bred to be hardy for certain climates such as hot climates, cold climates, wet climates and dry climates. They do not do well as house plants since they need normal seasonal changes to properly produce and open flower buds.
Care: A greenhouse azalea needs regular watering. Check it every couple days to make sure it is moist. When the top layer of soil in the pot feels dry to the touch , water the plant thoroughly (best done in a sink over a rack) and allow it to drain freely through the drainage holes in the bottom of the pot. If the plant was watered over a saucer, be sure to drain it after 15 minutes. A great way to double check whether you should water the azalea is to lift the plant periodically, comparing its weight to how heavy it seemed after you last watered it. Eventually you will know when it's ready to be watered, just by lifting the pot.
If the plant gets too dry, wait about 15 minutes after the first watering and repeat watering in the same way. If the plant still feels light when you lift it you may need to plunge the whole potted plant into a pail of water and allow it to soak until no more bubbles appear. Unfortunately when an azalea is allowed to get this dry it almost always drops a lot of leaves soon after and may even die.
While the azalea is blooming, keep it close to a window where it can receive at least 4 hours of indirect sunlight per day. Try to keep temperatures as close to ideal as you can. Night temperatures between 45° and 55° F and day temperatures that do not exceed 68° are the goal. Since this plant requires low night temperatures, it will probably have to be set in a cool entranceway or enclosed porch during the evening. The plant will probably tolerate a less than ideal location for a few days as long as you return it to a better place shortly thereafter. There is no need to fertilize while the plant is blooming.
Unlike other shrubs in the landscape, azaleas are shallow rooted and can be easily injured by excess fertilizer. In fact, some experienced azalea growers do not apply chemical fertilizes at all. They have found that plants usually can obtain sufficient nutrients for growth and flowering from the organic matter added to the planting hole and from the decaying mulch on the soil surface.
Chlorosis: Fertilizers, however, are occasionally needed. Pale green leaves or inter-veinal chlorosis are good indicators of a need for fertilizer. If you do fertilize, avoid using general garden fertilizers for rhododendrons, azaleas and other acid-loving plants. Use those specially formulated for acid-loving plants and follow directions. Fertilizers supplying the ammonium form of nitrogen are best.
How: Rhododendrons and azaleas grow well naturally at relatively low nutrient levels. Therefore, fertilization should be done carefully, or the fine, delicate roots close to the soil surface will be damaged. A fertilizer analysis similar to 6-2-1 applied at 2 pounds per 100 square feet to the soil surface is usually adequate. Cottonseed meal is also a good fertilizer.
Fertilizing our outdoor plants should be done in May, but not after July 1. Late summer fertilization may force out tender fall growth that will be killed by the winter. Broadcast fertilizer over an area extending 4 to 6 inches from the trunk to beyond the dripline or edge of the canopy. Be careful when broadcasting fertilizer over the top of plants, because the fertilizer granules may collect in the leaf whorls and cause foliar damage as it dissolves. Always fertilize when the foliage is dry, then use a broom or rake to brush residual fertilizer from leaves or stems. Apply overhead irrigation soon after application to wash any residual fertilizer from the foliage and to dissolve the fertilizer applied. Do not remove the mulch when fertilizing. The fertilizer will dissolve and move through the mulch with irrigation water and rain.
When: For most garden situations the old rule "once before they bloom and once after they bloom" is still a sensible approach. Actually the fertilizer timing has nothing to do with the time the plant flowers, it simply means once in the early spring, probably April then again in June. Never fertilize after mid-summer. Over-fertilizing is worse than not fertilizing at all. Established azaleas often do well with no fertilizer at all. Nutrients are slowly released by any organic mulch that you use, so rely on this as the primary source of nutrients. Excess nutrients may promote larger than normal populations of azalea pests like lace bugs and azalea whiteflies. It's very easy to burn up the fine roots. Fertilizing after late June in a northern climate promotes tender growth in the fall, which doesn't harden off before the first frosts of winter. This tender growth gets killed by the frost. This growth may have the buds for next year's flowers on it, which would also get killed by the frost. Research indicates that plants reasonably well supplied with nutrients, including nitrogen, are more resistant to low temperatures than those that are starved.
Do not fertilize at the time of planting, as this might injure the roots, but water deeply. Also, if newly purchased plants have little white BB-like balls in its container don't even think of fertilizing for a while. The little balls are fertilizer and those plants have been pushed to the hilt. Plant them as soon as possible and let them adjust. Plants that have been given a soil mixture rich in organic matter probably will not need feeding for several years. Do not stimulate fast growth because it produces long weak stems and few flowers. The National Arboretum warns: "Excess nutrients may promote larger than normal populations of azalea pests like lace bugs and azalea whiteflies. If your azalea foliage loses its deep green color, test your soil to make sure that the pH is not too high." But if a plant seems weak or sickly and the pH is not too high, use cottonseed meal or a special rhododendron-azalea-camellia-holly fertilizer such as Holly-tone dusted on the soil in early spring. Supplemental feeding later is not normally needed, but phosphorus and potassium may be applied any time.
What: Rhododendron guru Harold Greer <www.greergardens.com> wrote: "Oregon State University did extensive testing on peak fertilizer ratios for rhododendrons. They came out with a 10-6-4 formula. I have modified this a bit, and made it 20-12-8-8, the last 8 being sulfur. I also added some slow release nitrogen in the "20" of the mix. It has been a very successful mix for years, and is now sold to many people who swear by it. I have even sent bags of it to Alaska, where the cost of transportation is more than the cost of the fertilizer! Other mixes will work just as well, there is no one perfect secret fertilizer." Phosphate and potash do not disappear from the soil, but build up little by little with successive fertilizing. Therefore, the high phosphate formulas do not provide extra help to the plant.
Miracid (Miracle-Gro water soluble azalea & rhododendron fertilizer) can be more of a problem than a solution for outdoor plants. It is a 30-10-10 fertilizer.
For acidity, flowers of (powdered) sulfur or iron sulfate are best. Do not use aluminum sulfate since aluminum builds up in the soil and is toxic to most plants eventually. For flower bud production and hardiness, super phosphate is best. Around the base of each plant I use a tablespoon of dry sulfur and a tablespoon of dry super phosphate when a plant shows signs of problems.
For a general fertilizer for rhododendrons and azaleas, Holly-tone is preferred by many growers. It is an organic 4-6-4 fertilizer with powdered sulfur, minor elements such as magnesium, iron and calcium, and trace elements also. (The Miracle-Gro pelletized slow-release azalea and rhododendron product is OK.) When fertilizing only fertilize once in the spring and at half the rate on the package. Some people fertilize once before blooming and once after blooming, but only fertilize at half the rate on the package.
Do not mistake the normal wilting action caused by extreme heat or cold as an indication of a problem. It is normal and will go away when milder temperatures return. Desiccation of the roots can be serious in cold or hot conditions. Watering may be needed in winter or summer.
The "rhododendron tonic" is a good formulation for rhododendron and azalea problems indicated by chlorosis.
Diane Pertson, Otter Point, Vancouver Island ,
wrote: I have found the following foolproof formula for chlorotic leaves or a rhododendron that isn't looking healthy:
Purchase a bag of Epsom Salts crystals (magnesium sulfate) (available here in bulk at farm-and-feed outlets), about $4.00 for a 5 lb. bag - and a bottle of FULLY Chelated Iron & Zinc (this is a very concentrated liquid - the chelation means it is in a form that can be readily absorbed by the plant), about $7.00 for 1 quart; In a one gallon watering can, put in 2 Tbsp. of Epsom Salts crystals and 2 Tbsp. of Iron and Zinc liquid - fill with warm water and stir to dissolve; Sprinkle this over the rhododendron - by that I mean drench the leaves with the solution and pour the remainder around the drip line of the root ball.
In 1-2 weeks, the leaves should be nice and green. You could repeat the process at this time if the leaves aren't fully green.
This works even better if, a month before, you have sweetened the soil by sprinkling a little Dolomite Lime on the roots. Very acidic soil can prevent the roots from taking up nutrients. As many of my rhododendrons are planted in very acidic soil under a canopy of giant cedar trees, I find an application of Dolomite and a light topdressing of mushroom manure in late spring is all they need.
If soil is too acid, the symptoms can be the same. Very acidic soil can prevent the roots from taking up nutrients. In the western USA where many rhododendrons are planted in very acidic forest soil, an application of Dolomite and a light topdressing of mushroom manure in late spring is all they need. Sprinkle the lime on in late winter, very early spring. Don't overdo it - just a light sprinkle. If it is mid-spring, get the lime on right away so the rhododendron roots will be able to take up the soil nutrients in time for new growth. If you don't have rain, water it in well.
Coffee Grounds
Vicki Molina in Portland, Oregon, reported after using coffee grinds from Starbucks Coffee House for about 18 months that Van Veen Nursery was very satisfied with the results. 1) it helps to aerate their clay soil. 2) slugs don't like to go through. (So you can see they have both mixed in and put on top.) It does help to make the soil more acidic. But it does not replace fertilizer.
They suspect that by making the soil more acidic you are actually helping the uptake of magnesium. This in turn helps iron uptake and that helps to make the plant green. So really you are starting a process not fertilizing. Combine the coffee with horse mature and organic mulch and watch the amount of fertilizer you use decrease dramatically. As for how they apply it, when the plant is dry and just before it rains they sprinkle it on and around. The rain takes it from there. Otherwise they incorporate into the new beds. No exact rate, just cover the top and work it in. (Courtesy of Vicki Molina) Return to Top
Nutrient Requirements
Nitrogen & Magnesium: Rhododendrons require nitrogen for general well being and especially for foliage and flower production. To use nitrogen a plant needs magnesium, so magnesium sulfate (Epsom salts) is often used in conjunction with nitrogen if the plants look uniformly pale green or uniformly yellowish. It is best to use an organic nitrogen such as cottonseed meal, canola meal, fish meal or blood meal. Mineral nitrogen fertilizers are associated with increased problems such as chlorosis since they reduce the number of mycorrhizae.
Phosphorus: The Washington State University Extension publication EM091 states: “Do not use fertilizers containing phosphorus unless a soil test indicates a deficiency. The popular perception that flowering is enhanced by phosphorus is incorrect. In fact, the best flower production in rhododendrons was found in those plants that received the lowest levels of phosphorus." High levels of phosphorus in the soil can lead to chlorosis.
Potassium & Iron: Potassium deficiency can be difficult to diagnose. A plant must have sufficient iron to utilize available potassium. For this reason the symptoms of potassium and iron deficiency are almost identical in the initial stages. Potassium deficiency begins with leaves yellowing between green veins. Leaf tips and margins show scorch and necrosis.
Iron: Lack of iron causes much the same symptoms as lack of magnesium, but with the younger leaves also showing yellowing between green veins. Iron deficiency is frequently caused by too high a soil pH, often the result of mortar or mortar building debris in the soil near the roots. A soil test should be performed to see whether high pH is a problem and if it is the soil should be acidified. For a quick but temporary solution, ferrous sulfate can be added to the soil or chelated iron can be sprayed on the foliage, but the pH should be corrected for long-term good growth. In a few areas, the pH is too low and this also causes the same symptoms. In this case the pH needs to be raised. This can be done with lime.
Magnesium in the form of Epsom salts is sometimes recommended for rhododendrons. Magnesium is an essential element and lack of it will cause yellowish areas between green leaf veins on older leaves. If the leaves are a solid green, the addition of Epsom salts would not be useful.
Magnesium and calcium: A wide selection of the native species originating in Asia grows in mountains of dolomite limestone where the pH reading approximates 6.0. The addition of dolomite, which is a combination of magnesium carbonate and calcium carbonate, to our plantings darkens foliage color and increases flower buds. Gypsum, the common name for calcium sulfate, is another type of fertilizer some gardeners seem to have used successfully to improve the quality of their rhododendrons. Magnesium is an essential element and lack of it will cause yellowish areas between green leaf veins on older leaves.
Calcium is also essential to good rhododendron growth. Calcium can be obtained either from gypsum or from agricultural lime. Gypsum will not raise soil pH, while lime will, therefore, lime is not generally recommended on acid loving plants such as rhododendrons and azaleas.
Trace Elements: In addition to the major elements, most gardeners are familiar with iron and magnesium deficiency, but all do not realize a rhododendron requires some, but often only a minute amount of boron, manganese, zinc, molybdenum, copper and possibly aluminum. Most of these elements are usually in the soil, but if not available, they could be the cause of poor rhododendron performance of some kind. Many of the more expensive fertilizers incorporate these trace elements.
Soil Testing: The more avid gardener should test his soil for deficiency or surplus of basic elements. Sometimes the soil of a particular location is known for excessive boron, for example, or for low phosphorus content. A further problem could be the water supply which might contain too much salt or some of the heavy metals. The zealous grower should concern himself with this potential problem.
Acidity: Most authoritative books and articles state that rhododendrons are acid lovers and that the pH of the soil should be between 4.0 and 4.5. The late rhododendron nurseryman Ted Van Veen reported that a pH of 5.5 to 6.5 was quite successful in his nursery in Portland, Oregon.
Mycorrhizae: The word "Mycorrhiza" is given to a mutualistic association between a fungus (Myco) and the roots (rhiza) of the plants. This association is a Symbiosis because the relationship between the organisms brings advantages for both species. The macrosymbiont (the plant) increase the exploration area in the soil with the intricate net of hiphae that increase the uptake water and nutrients from the soil interface. The microsymbiont (the fungus) use the carbon provided by the plant to its physiological functions.
Dr. Dirr of Arnold Arboretum reported: "The word mycorrhizae often surfaces in relation to ericaceous plants. There is little doubt that they play a prominent part in plant survival under low fertility situations. I have collected roots from Vaccinium corymbosum, highbush blueberry, in the wild and noted extensive mycorrhizal infections. However, plants (Rhododendron, Leucothoe, blueberries) grown under high nitrogen nutrition failed to show an infection. Mycorrhizae are fungi that live in symbiosis with plant roots to the mutual benefit of host plants and fungus." Hence, it is widely thought chemical nitrogen fertilizers decrease the number of mycorrhizae in the soil.
Three major forms of Ericaceous mycorrhizae have been described:
Ericoid- This symbiosis are found on plants such as Callanu and Rhododendron that have very fine root systems and grow in acid soil.
Arbutoid- These associations are found on Arbutus, Arctostaphylos and several species of the Pyrolaceae. The fungi involved in the association are basidiomycetes.
Monotropoid- The fungi colonize achlorophyllous plants in Monotropaceae.
Mycorrhizae are probably most important in mineralizing certain essential elements, especially phosphorous. It is obvious that plants can survive without mycorrhizae. You might dig one of your rhododendrons and examine the roots. If the young roots appear swollen or flattened then there is a good chance the roots are infected."
To Fertilize or Not To Fertilize ...
Rhododendron guru Harold Greer of Eugene, Oregon, gives the following advice. "Rhododendrons do require adequate nutrients to grow and flower at their best, and these nutrients are usually provided from some form of fertilizer. Whether you use organic or 'chemical' is your choice. Applied in proper amounts, either type will produce healthy plants. A properly fed plant is hardier and will withstand more cold than one that is under-fed. Research done by Dr. Robert Ticknor of Oregon State University indicates that more nitrogen is needed than what was once thought. He now recommends a 10-6-4 (nitrogen, phosphate, potash) formula. While phosphate does promote bud set, apparently the plant can only use a certain amount. Unlike nitrogen, phosphate and potash do not disappear from the soil, but build up little by little with successive fertilizing. Therefore, the old high phosphate formulas do not provide extra help to the plant. For most garden situations the old rule of "once before they bloom" and "once after they bloom" is still a sensible approach."
Rhododendrons and azaleas have a fine, hair-like root system, which grows outward on the top 2-3 inches of soil. Do not cultivate around the shallow roots of rhododendrons and azaleas. Cultivating the soil around rhododendrons and azaleas can damage their roots. Instead, keep the roots cool and moist with a permanent 2- to 3-inch mulch of wood chips, oak leaves, pine needles, pine bark or other light airy organic material to conserve moisture and discourage weeds. Keep the mulch 2 or 3 inches from the trunk.
Because rhododendrons and azaleas are shallow-rooted, they are among the first plants in the landscape to show moisture stress. This is why a good mulch layer is very important. Watering is a critical element in growing rhododendrons and azaleas. Many rhododendrons have been killed by overwatering in sites where drainage was poor. If the soil is moist but the plant still wilts, mist over the plant lightly to increase humidity. This practice is especially important for newly planted evergreen species. Avoid excessive irrigation in fall. Plants kept dry in September will tend to harden off and be better prepared for the winter. If the fall has been excessively dry, watering should even be done after the first killing frost. At that time watering will not reduce winter hardiness but will prepare the plant for winter. The soil should be thoroughly moist before cold weather sets in. The best time for fall watering is about Thanksgiving.
Too much water can cause Phytophthora crown rot or collar rot or wilt. This root rot is the major killer of rhododendrons and azaleas. It develops when roots are growing in wet conditions. Plants infected with crown rot or collar rot caused by the oomycete, or water mold, Phytophthora have roots that become clogged with brown oomycete, or water mold, internally. The roots get blocked and the plant wilts and dies. There is not much of any cure for crown rot or collar rot. Some varieties of rhododendrons are vulnerable (Chionoides, Catawbiense Album, Nova Zembla) and some are resistant (Roseum Elegans, Scintillation, PJM). Sphagnum moss and bark dust combined with good drainage seem to prevent crown rot or collar rot, but do not cure it. Also, be sure to keep the mulch back 2 to 3 inches from the stem to prevent crown rot or collar rot.
Too little water can permit desiccation and also cause the plant to die. In less severe cases, drought has been observed to prevent flower buds from opening, as shown in photo on right, or causing open flowers to wilt prematurely. Usually watering is safer in cooler weather. In hot weather, moist roots can quickly progress into root rot. The best compromise is to 1) use a well-drained soil to prevent excessive moisture, 2) use a mulch to keep the soil cool and moist, and 3) only water after soil has started to become deficient in moisture. You can usually sense this when the leaves roll and only unroll at night. However this same condition occurs when the plant contracts root rot. [Photo courtesy of Harold Greer]
Wilting: Do not mistake the normal wilting action caused by extreme heat or cold as an indication of a problem. It is normal and will go away when milder temperatures return. Desiccation of the roots can be serious in cold or hot conditions. Only water when necessary and in hot weather always err on the dry side, but don't hesitate to water plants that look wilted in the morning. In hot weather it is normal for rhododendrons to look slightly wilted in the heat of the day, but if they look wilted in the morning, then they are too dry. Watering may be needed in winter or summer. The photo on the left shows foliage damage to new growth from a drought. [Photo courtesy of Harold Greer]
When transplanting watering is much more critical since the root structure is usually compromised and is less capable of supporting a large mass of leaves. That is one reason that transplanting is more successful when the plant is dormant in cold weather.
Rhododendrons and azaleas have a fine, hair-like root system that grows outward on the top 2-3 inches of soil. Since the roots are so shallow, any cultivating or pulling roots out will disturb the roots. They like moist, but well drained soil with lots of organic matter and a good dressing of mulch. Soil around the rhododendron's shallow roots must be kept cool. To keep the soil weed free, cool and moist, mulch it with a 2-3 inch layer of an airy organic material such as shredded leaves, leaf mold, pine needles, or pine bark mulch. Don't use shredded hardwood mulch since it often drives the pH upward. Pine bark is especially useful since it can lower the pH where it is too high, but it is best used on relatively flat ground since it's light in weight and tends to float away in heavy rain. [Sketch courtesy of Harold Greer]
Rhododendrons do best when they have about a 2" to 3" layer of mulch to hold in moisture, prevent weeds, and keep the roots cool. Since most mulches are organic, they need to be topped off periodically, usually about every year or two. Do not make the mulch over 3" thick. Keep the mulch about 3" to 4" back from the trunk/stem of the plants to avoid collar rot, bark split, rodent damage and providing shelter for weevils. Mulching does increase the risk of weevil damage. It is best to mulch with a 2-inch layer of an airy organic material such as conifer wood chips, ground bark, pine needles, pine bark or rotted oak leaves. A year-round mulch will also provide natural nutrients and will help keep the soil cool and moist.
Cedar Bark Pine Bark Nuggets
Pine Bark Mulch Pine Straw
Most experts agree that needles, bark or wood of softwoods (conifers like pine, fir, spruce, redwood, and hemlock) are acidic and make good mulch when chopped up. The leaves of some trees, including beech, oak and pine needles, fall in the 4.3 to 5.5 pH range, making them highly acidic. However, that acidity lessens as the leaves decompose. If more acidity is needed, mulching with sphagnum moss will add needed acid as it slowly decomposes.
Also, in the winter such a layer protects the roots from freezing and thawing cycles that cause heaving. Keep the mulch from touching the trunk to avoid bark split, fungus and rodent damage. One common misconception is that peat moss is a mulch. It is not. In fact when one uses peat moss as a mulch, it wicks moisture out of the soil rather than holding moisture in the soil which is the normal function of a mulch. Peat moss is a soil amendment to be used when preparing the soil in a bed and can cause severe problems when used as a mulch including preventing moisture from reaching the soil. It also tends to blow around.
Mulching is a simple yet beneficial cultural practice for azaleas. Mulches conserve water in the soil, insulate roots against summer heat and winter cold, and discourage weeds. Replenish mulches annually, as needed, to maintain a 3- to 5-inch layer on the soil surface. Fine-textured organic mulches such as pine straw or shredded bark are best. Fall leaves are an excellent mulch.
Avoid cocoa shell mulch. It harms rhododendrons and azaleas. It blows away in strong winds. If floats away in heavy rains. It can kill a dog, not common but has happened. Cocoa shells have a high potassium content that injures plants such as maples, lilacs, rhododendrons, and azaleas.
The roots and nut hulls of Black Walnut (Juglans nigra L.) and Butternut (Juglans cinerea L.) produce a substance known as juglone (5-hydroxy-alphanapthaquinone). Persian (English or Carpathian) walnut trees are sometimes grafted onto black walnut rootstocks. Many plants such as tomato, potato, blackberry, blueberry, azalea, mountain laurel, rhododendron, red pine and apple may be injured or killed within one to two months of growth within the root zone of these trees. The toxic zone from a mature tree occurs on average in a 50 to 60 foot radius from the trunk, but can be up to 80 feet. The area affected extends outward each year as a tree enlarges. Young trees two to eight feet high can have a root diameter twice the height of the top of the tree, with susceptible plants dead within the root zone and dying at the margins. The juglone toxin occurs in the leaves, bark and wood of walnut, but these contain lower concentrations than in the roots and nut hulls. Juglone is poorly soluble in water and does not move very far in the soil. [From Ohio State University Extension Fact Sheet HYG-1148-93 by Richard C. Funt and Jane Martin]
The Ohio State University Extension and the American Horticultural Society have reported that R. periclymenoides, formerly R. nudiflorum, Pinxterbloom Azalea, and Exbury Azaleas Gibraltar and Balzac will grow near Black Walnut and Butternut trees. They also list many other plants that will grow in the root zone of these trees.
Conversely, some rhododendrons will kill plants growing near them. That is one thing that is so insidious about R. ponticum in England. The ponticum runs rampant and kills nearby plants. This property of one plant to secrete a chemical that affects other plants to help it gain an edge in plant competition is called "allelopathy".
Unfortunate for us and fortunate for deer, conditions are favoring an explosion of the deer population. Deer are becoming a problem even in some urban areas. They are threatening their own habitat. Depending upon the deer pressure in your area, you response will vary. Where deer are just casual visitors, usually a number of deer repellents will work. They only work for a while, so it is best to rotate use among them. Some repellents used are: eggs, human hair, soap, feathermeal, bloodmeal, creosote, mothballs, tankage and commercial chemical repellents. The greatest amount of protection for home gardens with repellents is obtained by using several different repellents and rotating their use. Repellents should be applied before damage is likely to occur and before deer become accustomed to feeding on the plants.
Rhododendrons with a heavy indumentum (fuzz on the underside of the leaves) are not popular with deer and are usually not bothered. Some of the cultivars known as "Yaks" have this indumentum. Among the most popular plants are 'Mist Maiden' and 'Ken Janek.' There are many sprays to deter deer and they all work for a while, usually until the deer become hungry. They all are temporary and have to be reapplied after every rain, or every couple weeks when it doesn't rain. A Swedish product has the promise of deterring deer for up to 6 months. Tests have shown that it causes about a 95% reduction in deer damage. The product is Plantskydd Deer Repellent.
The following are home remedies (Table 1) and commercial chemicals (Table 2) which repel deer.
Noncommercial Deer Repellents (Home Remedies)
Repellent
Type
Application
Egg spray
Odor
A whisked egg to a gallon of water. Must be reapplied every 2 or 3 week and after rain. This has been successful for many people in Pennsylvania.
Milorganite
Odor
This is sewage plant sludge from Milwaukee, WI. It is safe and sold as a 6-2-0 fertilizer. When used on turf areas around rhododendron beds at half the normal rate for turf, it deters deer from the area. It must be applied monthly and after heavy rainstorms and each snowfall. When covered by snow it looses its effectiveness.
Human Hair
in Bags
Odor
Collect male hair from local barbershop. Put two large handfuls of hair in open mesh bag. Hang bags near crops 28-32 inches above ground every 3 feet.
Tankage in
Bags
Odor
Put 1/2-1 cup of tankage (animal waste) in cloth bag. Hang bags in same manner as hair.
Bars of
Soap
Odor
Brand makes no difference. Use small bars or cut large ones in sections. Hang by wire in same manner as hair.
Published in
Audubon
Magazine
Odor
Half-cup of whole milk whisked together with one egg and combined with a tablespoon each of cooking oil and lemon-scented dish detergent, diluted in one gallon of water. For a more potent brew, he spices it up with a couple of drops of rosemary oil and a dash or two of hot sauce. This mix should be applied to plant leaves with a spray bottle every 10 to 12 days, and in spring it can be combined with fish emulsion for fertilizer.
The most effective method is deer fencing. After that, the egg spray seems to be next best. To keep deer from becoming acclimated to a particular repellent, frequently switch to different ones. The most popular commercial products are Deer Solution, Liquid Fence, Deer Stopper, Deer Off, Bobbex and Hinder. Liquid Fence seems to be the most popular commercial product. All methods are enhanced if one also uses Milorganite.
Since 1994 I have had to prevent deer damage. Deer love to eat green leaves and needles; when snow is on the ground our shrubs are the greenest things around. They do avoid spruce, but they eat most everything else including rhododendrons and azaleas.
If you have had winter deer damage, just make sure that in the spring the plants have good culture, making sure they are not suffering from chlorosis or any other problems. I might add a little Holly-tone but nothing stronger. I need to use super phosphate since my soil is phosphorus deficient and phosphorus is vital to the well being of the plants. I add sulfur near buildings since my soil tends to loose its acidity near masonry walls which leach lime into the soil, even after 190 years.
Deer Netting: To prevent winter deer damage you need to take prompt action in the fall and subsequent falls to insure it doesn't happen again. I used a product found in hardware stores called deer netting. It is similar to bird netting but heavier and courser. I wrapped groups of plants together and wrapped isolated plants individually. I fastened it on with tie wraps or twine and just cut the tie wraps or untied the twine in the spring. The important thing is to take deer netting off in the spring before the rhododendrons and azaleas sprout and grow through it. If the foliage does grow through the netting, the netting is very hard to remove without damaging the plants. Also, the portion of the plant that grows through the fence is no longer protected. The deer netting is good in that it doesn't get covered with snow unless it is a very wet snow. Otherwise the snow just goes through it.
One interesting side effect is that squirrels don't see deer netting too well and bounce off it like a trampoline. They soon learn to watch out for it. Eventually, after 15 years the deer figured out how to push on the netting so that the branches would poke through and they could eat them. After that winter, I switched to deer fencing.
Deer Fencing: Deer fencing is heavier product. I have a couple beds of azaleas that were decimated during the summer before I used deer fencing. It is typically 8' tall and can be wire mesh or a heavy plastic mesh. First, I purchased the heavy plastic mesh deer fencing with easy to install steel posts.
I used a combination of deer fencing around a smaller area with intense planting and deer netting in a larger more spread out area. In the winter of 2009-2010 deer were able to defeat the deer netting and started damaging the plastic deer fencing. I resorted to an 8-foot high-tension steel wire-mesh fence around most of the approximately 1-acre yard to the sides and behind our home where we have most of the trouble. It has 12-foot gates where vehicles can pass through and a 5-foot gate where people normally pass. Here is a photo:
We put our deer fence around our side yards and back yard. It does not enclose our front yard or the area in front of our garage. Things planted in our front yard are things deer haven't bothered yet. These include hellebores*, lavender*, iron clad rhododendrons, a schlippenbachii azalea, pieris*, boxwood*, yew, daffodils*, vinca, globular arborvitae, candytuft, narcissus*, garden sage*, rosemary*, blood root, hyacinth, mahonia*, allium*, cactus*, mints*, peony*, Dwarf Alberta Spruce*, yucca*, juniper*, and iris*. (An * indicates they are fairly deer-proof. The others are ones where we are just lucky so far.)
Our fence is steel mesh stretched tight over large treated posts. It is agricultural grade and put up by the same people that put up farm fences. The only difference is that it is 8' high. Farmers that raise organic vegetables are using the same 8' deer fence around their farms except with untreated cedar or cypress posts to protect their crops from deer.
When using deer netting or fencing in an area that is heavily traveled by deer, place something visible like plastic grocery bags on the netting so the deer can see it and avoid it. I wove in a white ribbon commonly used as horse fencing into the fence after a deer got stuck trying to jump over the fence. Soon they changed their travel path and it wasn't a problem. However, if a new fence or deer netting is placed across their natural path, they will do almost anything to get through. Persist until you get them to change their travel path.
Research by various state horticulture departments shows that the typical deer resistance of rhododendrons and azaleas is:
When: Most people prune rhododendrons and azaleas after they bloom but before mid-June. This accomplishes 2 goals, it preserves the current seasons bloom, and insures time for the plant to produce flower buds for the next years bloom. Actually the best time to prune rhododendrons and azaleas is in March since this gives 2 extra months for regrowth. Pruning after mid-June can remove some of the next year's flower buds and results in poor regrowth. If one is cutting back an overgrown plant and doesn't want to loose all of the flowers, then leave some of the buds when pruning, and prune those branches back the following March. As with most spring bloomers, rhododendrons and azaleas set the next year's flower buds by mid summer and by fall the buds are fairly well developed. If one's intent is to improve the health of the plant by removing dead branches and open the plant up by removing some of the branches where they crowd together or cross each other, then one can be careful to leave an adequate number of buds to provide some bloom. If you remove 1/3 of the buds doing this, there will be remaining branches with plenty of bloom PLUS this gives 2 extra months for regrowth. Pruning after mid- June removes the next year's flower buds and results in poor regrowth. Fall pruning is never advisable since rhododendrons and azaleas have dormant buds beneath the bark, which sprout to form new growth after pruning which must have time to mature and harden off.
Deadheading: For maximum flower production, pinch off faded flowers or the developing seed capsules that follow [deadheading]. Most successful rhododendron gardeners do not deadhead. It is not because they don't believe in it or that they don't want to do it, but rather because they have so many plants and so many other more important tasks that they don't have time to do it. Does this cause a problem? Not really. Some plants that are reluctant to bloom or have disease problems such as petal blight or in an area that is marginal for the plant in question may benefit from deadheading, but that is unusual.
How: Pruning is seldom needed except for removal of faded flowers, but if you do prune, it is best to prune in March. One can prune out up to 1/3 of branches with flower buds. This will reduce the bloom, but the remaining branches will provide plenty of bloom and the plant will have 2 more months of regrowth. There is little need for pruning azaleas and rhododendrons. If growth becomes excessive, reduce the size with light pruning. Azaleas sometimes branch poorly and form a loose, open shrub. Plant form can be improved by pinching out the soft, new shoots of vigorous-growing plants. Rhododendrons and azaleas may be pruned to induce new growth. Prune out dead, diseased or damaged branches, and in cases where plants have become scraggly, start cutting the oldest branches back to encourage growth in younger branches. Pruning in the fall is not recommended for several reasons. It will remove the buds for next year's flowers and stimulate regrowth that will not harden off before winter and freeze back and die.
With the larger leaved rhododendrons (elepidotes), you must prune just above growth joints. Each year as the plant starts to grow there is a visible point where the plant started growth. We call this point a growth joint. Prune just above this point, because that is where the dormant growth buds are located. Don't prune between joints, because there are no dormant growth buds in that area. However, with azaleas and the small leafed rhododendrons (lepidotes), you may prune anywhere along the stem, though you may not be able to see them, these plants have dormant growth buds nearly everywhere.
As a plant grows, some of the inside limbs will be shaded out and become weak and die. It is a good idea to remove these, plus other weak limbs that are on the ground or crossing over each other. This provides better air circulation and does not provide a place for insects and diseases to start. Check azaleas for wilting or dead branches in late summer that may be the result of fungal cankers. These branches should be pruned back to clean white wood that is not infected while the weather is dry to prevent the spread of diseases.
Azaleas: Evergreen azaleas can be sheared for hedges or borders. Unlike rhododendrons, evergreen azaleas can be sheared each year after flowering to create a dense rounded plant. This is done extensively and with great results by highly trained Japanese gardeners. Deciduous azaleas can be cut anywhere on the stem and they will branch from that point, though they should not be sheared as severely as evergreen azaleas. After pruning, spraying with a fungicide may prevent infection.
A little Rhododendron/Azalea trivia: One Rhododendron blooms on new growth after it sprouts in the spring. It is Rhododendron camtshaticum. It is a small deciduous species that grows in the Bering Straits of Alaska and on the northern islands of Japan. It has rosy plum flowers and has at least one rare white form.
Pinching: A friend of mine has the most beautiful rhododendron and azalea garden. All plants are about waist height. From any place in the garden you can see just about every plant. During the flowering season it is awesome. I asked him how he keeps the plants so well kept and his reply was that he just removes the top foliage buds each year with his fingers in the late fall or early spring. This can be done once the rhododendrons reach the height you want. Then each spring after the flower buds start to swell and the smaller leaf buds are obvious, break off leaf buds [pinching] on the top of the plant to prevent it from growing taller. You must be careful not to damage any flower buds. No pruning at all. This technique minimizes disease and insect damage. It works very well for him. It is labor intensive, but well worth the effort.
Severe "Rejuvination" Pruning: If necessary, you can remove a great deal of material. When doing this it is best to prune in March to allow time for regrowth. It is a general rule to not remove over 1/3 of the leaf area each year. This should also leave adequate buds to provide plenty of bloom. Pruning is generally used to control unsatisfactory height or width of a plant. I don't prune very often and try to limit pruning to plants which have a shape that is unsatisfactory or dead branches. If I want to cut trusses for bouquets, I always cut the tallest flowers since this helps keep the plant within bounds.
Severe pruning, often called rejuvination pruning, is not uncommon with rhododendrons and azaleas. Sometimes a healthy plant can be cut to 6" above the ground and will come back, but this is very risky. Rhododendrons and azaleas have dormant buds beneath the bark, which sprout to form new growth after severe pruning. However, Richard Colbert reported that such attempts at Tyler Arboretum were only successful if the plant had enough sun light. Those in heavy shade frequently died. He recommend first opening up the shade by thinning the forest canopy. Then he recommends just removing some of the top to induce new growth at the base. Then when that new growth is established, the remainder of the top can be removed.
First prune off the damaged part. You can leave a stub. Azaleas have hidden "adventitious" foliage buds under the bark, which will break dormancy and sprout new branches given the right stimulation such as not too much shade. If the damaged plant is in heavy shade, it is important to open up the shade by thinning the forest canopy or moving the plant. After you have waited several years to see what sprouts, you can go back and prune off dead stubs. However don't be too eager to cut back right away. Wait until the buds have a chance to sprout. To get buds to sprout and fill in the gap you need to fertilize and prune:
Fertilize twice a year. Once before blooming and once after. Use a good azalea fertilizer like HollyTone at half the rate on the package.
Prune soon after blooming. Prune the side that is already large enough to encourage the other side to sprout buds. Let the "bald" side develop new branches. After these new branches get established you want to break off the terminal buds on branches on the "bald" side to get them to branch out like you would pinch back an mum to get it to branch out.
Prune to open up the plant so light can get to the "bald side". Buds usually don't form well in shaded areas.
It is important to remove diseased material from the vicinity of a planting. This means removing dead material that harbors spores of fungal disease and dying material that contains eggs of insects. Dying portions of a plant should be cut off and removed. The ground should be cleaned of dead leaves or flower parts. Pruned parts should be removed.
Deadheading flowers involves removing the structure left after blooming before seedpods form. A rhododendron or azalea flower is composed of several florets connected to the stem by a base that is easy to break. When deadheading just grab the flower near this base area and twist the flower sideways and break it off in this spongy area. Try not to break any of the buds that are around the base of the flower.
In general all dead or dying plant material may harbor disease and should be destroyed by incinerating or placing in a trash receptacle. Wilted flower petals can harbor fungi such as petal blight. Dead stems can harbor larva of borers. Dead leaves can harbor spores of harmful fungi. On healthy plants, deadheading is desirable but not necessary. [Photos by Steve Henning]
Is deadheading necessary? If the blooms were healthy, and if the plant blooms well every year, and if you don't mind the look of the plant with the wilted blooms, then there is no reason to remove them.
However, if the blooms were infected with petal blight, or if the plant doesn't have a good bud set or only has a good bud set every other year, or you don't like the look of the plant with the spent flowers on it, then remove them.
On some varieties deadheading makes a difference, on some it doesn't matter at all. On most varieties, it will only make a small difference if any. Most gardeners would like to deadhead but few actually do.
If you are getting petal blight, then deadheading is very important. All spent flowers should be destroyed. The best way is to toss them in the trash. Petal blight is a disease that hits some rhododendrons and azaleas that bloom later in the spring. It causes the flower to turn mushy before it naturally wilts. If you look closely it forms unsightly brown spots on the flowers.
Plant propagation has two general types: sexual, and asexual or vegetative. Sexual propagation results in seed. It involves two parents and the seedling is a genetic blend of the two parents. Sexual propagation is usually done when the favorable characteristics of two parents are wanted on one plant. This is the field of hybridizing. It sometimes results in markedly improved plants, but a great deal of trial and error is involved. Once a successful hybrid has been created, it must be propagated by asexual methods to make genetically identical plants. Asexual or vegetative propagation is when vegetative tissue is nurtured into a new plant that is genetically identical to the original. Of course, a graft has different roots and top, but the top is genetically identical to the scion. However, the rootstock may cause variation from the original plant, such as dwarfing, disease resistant and tolerance of near alkaline conditions.
Seed: Gather seed capsules in the fall when they turn brown. Allow them to dry, remove and clean the seeds, and keep them in an envelope. In February, sow the seeds in a small pot containing 50% milled sphagnum moss and 50% horticultural perlite. Do not cover the seeds with the medium; just sprinkle the seeds on top. The germinating mixture should be sterilized with boiling water and allowed to cool before sowing. The pot needs to be in a controlled humid environment. Polyethylene bags are great for maintaining a high humidity. The pot is placed in a polyethylene bag with stakes to keep bag away from the germinating seed and placed in a light area with no direct sunlight. The pot is rotated once or twice a week to compensate for variations in light and temperature. Generally, no winter chilling is necessary to get the seeds to break dormancy. Keep the seed pots or flats in the 65°F to 75°F range. The seed will sprout in from 3 to 8 weeks (sometimes longer), and after they have formed their first set of true leaves they can be transplanted into other flats or containers. Since they are so tiny, they will not stand frost until they are larger and some months older. The seedlings will need to stay in the flats for probably 2 years. It's important to remove the plastic bag gradually.
David Fisher of Wiscasset, Maine, recommends "sowing the seed on top of live moss - this works for all ericaceous plants. I've generally used haircap moss, but any species should be fine." A number of nurserymen do this also.
Cuttings: Propagation of hybrid plants and selected cultivars of species requires a form of cloning. These include cuttings, tissue culture, grafting, and layering. Most rhododendron and evergreen azalea cuttings root fairly easily. Deciduous azaleas require special techniques to root.
1) Most rhododendrons and evergreen azaleas may be propagated from stem cuttings. Cuttings are usually taken in the early fall from new growth that is just beginning to harden off. Generally, softer wood roots more readily than harder wood, though the softer the wood, the more likely it is that problems will occur with fungus diseases. Cuttings are taken in the morning when full of moisture. The cuttings are usually terminal cuttings with one whirl of leaves and the leaves cut in half (to reduce the leaf area), and any flower buds removed. Wound the cutting with a cut on each side, about 1/2" to 1" long, just deep enough to remove a sliver of green bark. Dipping the cutting in a rooting hormone containing indolebutyric acid will aid rooting. The cutting has the end cut off just before dipping in rooting hormone containing a fungicide. Then the cuttings are placed in a flat of sterile media containing a mix of 50% milled sphagnum moss, and 50% horticultural perlite or vermiculite. The flat is placed in a polyethylene bag with struts to keep the bag away from the foliage and placed in a light area with no direct sunlight. The flat is rotated once or twice a week to compensate for variations in light and temperature. Using bottom warmth of 70-75°F will encourage root growth. Rooting usually takes about 6 weeks for evergreen azaleas and 3 to 4 months for large-leaf rhododendrons. Once the cuttings have rooted, pot or transplant them to flats containing a sterile mix of 60% milled sphagnum peat moss and 40% perlite. Fertilize once a month with an acid-based azalea plant food like Peters. Removing terminal buds promotes sturdy well-branched plants.
2) Deciduous azaleas are very tricky to propagate from cuttings. Take cuttings of deciduous azaleas when the new growth is soft and pliant. This is often coincident with time of bloom in early June. The ability to root decreases rapidly as new growth matures. Trim cuttings below a node (overall length of cuttings 3 to 5 inches) and dip in a rooting hormone containing fungicide. Insert in a medium of 60% milled sphagnum peat moss and 40% horticultural perlite. Usually bottom warmth of 75°F is used to encourage root growth. In late August, transplant cuttings that are rooted and grown on in the greenhouse with supplementary light (14-hours a day) to prevent dormancy and induce new growth. In the following fall, transfer to a cool, frost-free (35°F to 41°F) environment to induce dormancy. As new growth develops in the spring, transfer plants to a shaded environment. [After "Rhododendrons and Azaleas" by J. Lounsbery, Horticultural Research Institute of Ontario, Canada]
Layering is the easiest form of propagation for the home gardener. A lower branch is held down on soil (not mulch) with a stone. A slit is cut in an area in contact with the soil and the cut is treated with a rooting hormone. Then the cut area will sprout roots. When the roots are developed enough to support the end of the branch, usually in 2 years, the branch is cut from the parent plant and, if desired, transplanted.
Grafting takes a difficult to root cutting and grafts it onto an already rooted plant. It was the standard propagation technique prior to the 1950s and is still popular in Europe where acidic soil is not common and plants that are hard to grow can be grafted onto rootstocks of plants that are easy to grow like Cunningham's White. The big advantage of grafting is the use of disease resistant, soil tolerant rootstocks. Also, some hybrids don't produce good root systems, so if the plants are grafted onto a good rootstock, this is no longer a problem. There are two basic techniques of grafting, one involves grafting onto rooted rootstocks and the second involves grafting and rooting the rootstock at the same time.
The Conventional Side Graft
First, the conventional side graft at the Rhododendron Park in Bremen, Germany.
The rootstock is rooted and grown for about 2 years before used in the graft. An elastic band is used to secure the graft.
The Graft & Root Method
Second, the graft & root process shown after the rooting has completed at Timo Schröder's Nursery in Wiefelstede, Germany.
The cuttings for the rootstock and the scion are taken at the same time. The scion is side grafted to the rootstock cutting and secured with raw cotton string which rots naturally. The top is left on both cuttings. The rootstock is rooted immediately after the graft is secured. After the rootstock has rooted, its top is removed immediately above the graft. They don't care if the scion forms roots but they do not want the rootstock to form shoots. Any such shoots are removed.
There are many types of grafts and times of the year they can be done. One method used is in the spring just before growth starts, take a cutting which in grafting is called a scion and prepare it much as we mentioned in the section on cuttings, only this time cut the bottom end of the cutting into a long pointed "V" shape. Then take the plant you are using as rootstock and cut a slit about the length of the "V" you cut on the cutting. This slit can either be at the tip of the limb of the rootstock (top grafting) or into the side of the limb (side grafting), but it should be in wood where the bark is still green. Be sure to match the cambium layers (the green layer just under the bark) of the cutting and rootstock. Try to choose a cutting and an rootstock limb that are the same size so you can match the cambium layers on both sides, but if you can't, matching one side should work. In all cases remove suckers that come up from the rootstock.
Hold the scion in place using a rubber grafting strip, tape, or grafting twine. Seal the entire graft area with warm grafting wax or grafting paint. Remove the rubber or twine shortly after the union has healed. Never allow the binding material to girdle the stem. For more on grafting visit the North Carolina State University web page on Grafting.
Tissue culture or micro propagation is a very popular method of producing large numbers of rhododendrons for commercial use. Over simplified, it involves taking a piece of rhododendron wood and putting it into a test tube. Through the use of agars and auxins, absolute sanitation, proper temperature and lights, the piece of wood is induced to grow into multiple "seedling-like" growths with no roots. This tiny juvenile wood is then rooted. Needless to say this method is not for the general home gardener, though some "kitchen tissue culture" is being done. In some cases there seems to be some genetic damage or other variations in some tissue cultured plants and they don't all come out as clones of the original plant.
Altenaria Blight, Altenaria sp.: Azalea and rhododendron flowers can be affected by this disease. The disease is characterized by a gray powdery fungal growth over the flower. The fungus will kill the flower. It is similar to Botrytis Blight and Twig Blight.
Azalea Rust, Puccininastrum vaccinii: Many of the Heath family are susceptible to rust, including azaleas, rhododendrons, and blueberries. Small pustules appear on the underside of leaves. These pustules burst open to discharge bright yellow or brownish spores that re-infect the rhododendrons or azaleas. The alternate host is the eastern hemlock, where the clustercup stage appears on its needles. This stage is not necessary to the spread of the fungus among the Heath family as the summer stage can over-winter on rhododendron. Control of this disease is usually not necessary. This disease is relatively uncommon in landscape plants. Many of the newer varieties are even less susceptible. This rust typically infects deciduous azaleas, especially the deciduous azaleas 'Klondyke', 'Peachy Keen', 'Pink William', 'Primrose', 'Rufus', and 'Sunrise'. Control by avoiding those hybrids and species that are very susceptible to rust. Good air circulation is helpful. Some deciduous azalea varieties that are resistant include 'Balzac', 'Gibraltar', and "Red Letter". Triadimefon seems to help, but may not be registered for use on rhododendrons.[Photo courtesy of Harold Greer]
Botryosphaeria Dieback, Botryosphaeria dothidea: Rhododendron Dieback is caused by the fungus Botryosphaeria dothidea. Typically, dying branches (stem dieback) begin to appear on an otherwise healthy plant. The leaves die and can remain attached to the plant until late summer. Usually a single branch on an established plant is affected. Scraping away the bark with a knife reveals a reddish-brown discoloration under the bark on dying branches of rhododendron. Dieback is difficult to control on rhododendrons in the landscape. The following rhododendron varieties are considered resistant: 'Boursalt,' 'Chionoides White,' 'Cunningham's White,' 'English Roseum, 'Le Barr's Red,' 'Roseum Two' and 'Wissahickon.' Reduce stress to the plants by planting in partial shade and watering during dry periods. Avoid wounding the plant. Prune infected branches well below all discolored wood and dispose of dead plant material. Clean pruning tools between cuts with a dilute solution of household bleach (1 part bleach to 9 parts water). Return to Top
Botrytis Blight, Botrytis cinerea: Azalea and rhododendron flowers can be affected by this disease. The disease is characterized by a gray powdery fungal growth over the flower. A mass of gray spores may be produced on the leaf surface. Infected shoots bend over at the lesion and may remain crooked or die back. The fungus will kill the flower. Purple varieties are more susceptible to this disease. True resistance is not available as Botrytis is an opportunistic pathogen. To help reduce disease incidence, growers adjust plant spacing to reduce humidity and increase air circulation. It is similar to Altenaria Blight and Twig Blight.
Bud Blast, Seifertia azaleae: Bud blast is a symptom of the fungal diseases Seifertia azaleae, Pycnostysanus or Briosia azaleaea, but may also be caused by a late frost or application of a nitrogen containing fertilizer too late in the season which prevents the buds from hardening off. In all cases the buds turn brown or black. Bud Blast will cause the dead bud to be covered with short hair-like structures. They are best controlled by sanitation, but may be reduced by spraying buds with fungicide. Avoid application of nitrogen after late spring, but phosphorus and potassium may be applied during the growing season. [Photo courtesy of Harold Greer]
Crown Gall, Agrobacterium tumefaciens: a bacterial disease of rhododendrons. This bacterium causes the host plant to produce galls at the crown, on roots, or on branches. The gall is a light tan color at first but turns brown to black with age. Galls are soft and round when they first form but later develop a irregular, rough, and corky surface with a woody interior. The size of the gall varies from the diameter of a pea to a foot or more. Plants may be stunted, discolored, and die back. Young plants eventually wilt and die while older plants survive in a weakened condition.
Exobasidium Leaf and Flower Gall, Exobasidium vaccinii: Exobasidium vaccinii is a very common fungal disease in the spring during wet, humid, cooler weather on azaleas and occasionally on rhododendrons. Some of the native rhododendron species (azaleas) are more susceptible than hybrid rhododendrons. In April and May leaves and buds of infected plants develop distorted growth. The fungus invades expanding leaf and flower buds causing these tissues to swell and become fleshy, bladder-like galls. Initially, the galls are pale green to pinkish. Eventually, they become covered with a whitish mold-like growth. Fungal spores are produced within the white growth and are spread by water-splashing or wind to other expanding leaf or flower buds, or they adhere to newly formed buds, over-winter, and infect these buds the following spring. Older leaves and flowers are immune to infection. As the galls age, they turn brown and hard. The disease does not cause significant damage to affected plants. It just looks unsightly. If only a few plants are affected, pick and destroy galls. Also see Gall Midge.Return to Top
Necrotic Ring Spot, Leptosphaeria korrea: Necrotic ring spots are caused by a virus thought to be a potexvirus. The symptoms are reddish-brown rings or spots on the leaves. It generally occurs only on the two-year leaves of a few rhododendron cultivars such as R. 'Unique', or on Kalmia latifolia. It also appears on the first year foliage of some R. 'Loderi' clones. Little is known about the disease and it does not seem to spread from one cultivar to another. No control is known or generally necessary. Also see Leaf Spot. [Photo courtesy of Harold Greer]
Pestalotia Leaf Spot, Pestalotia rhododendri: If a leaf has brown areas with white spots, it probably has a local fungal infection of Pestalotia leaf spot. This is seldom controlled with fungicides and is best mitigated by good sanitation and avoiding excessive moisture. Also see Leaf Spot.
Petal Blight, Ovulinia azaleae: This fungal disease, caused by Ovulinia azaleae, primarily affects the flowers of azaleas, but mountain laurel and rhododendron flowers can also be infected. Indian and Kurume azaleas are especially susceptible. The disease starts on the flower petals as tiny, irregularly-shaped spots, giving a "freckled" appearance. On colored flowers the spots are white, and on white flowers the spots are brown. The spots quickly enlarge and become soft and watery. Flowers rot and stick to the leaves. Infection is easily spread from flower to flower by wind, rain and insects. The fungus survives the winter in the soil. The most important things that you can do to control this disease in the home landscape are to pick and destroy infected flowers and avoid overhead watering. This fungus survives in the soil, so it is important to replace the ground litter with uncontaminated mulches. Rake and remove flower debris from beneath plants and, if possible, remove old flowers still attached to plants. Apply new mulch around the base of plants to serve as a barrier to new infection. On large azalea plantings, where it is not practical to remove infected flowers, make weekly fungicide applications beginning just before bloom and continue until the last buds open. [Photo courtesy of Harold Greer] Return to Top
Phomopsis Dieback, Phomopsis rhododendri: Azalea Dieback is caused by the oomycete, or water mold, Phomopsis rhododendri. Typically, dying branches (stem dieback) begin to appear on an otherwise healthy plant. The leaves die and can remain attached to the plant until late summer. Usually a single branch on an established plant is affected. Scraping away the bark with a knife reveals discolored wood under the bark that appears chocolate brown. Dieback is difficult to control on azaleas in the landscape. The azalea varieties that are the least susceptible include: 'Delaware Valley White,' 'Hershey Red,' 'Pink Gumpo' and 'Snow.' Reduce stress to the plants by planting in partial shade and watering during dry periods. Avoid wounding the plant. Prune infected branches well below all discolored wood and dispose of dead plant material. Clean pruning tools between cuts with a dilute solution of household bleach (1 part bleach to 9 parts water). Also see Phytophthora Dieback, Phytophthora Root Rot and Rhizoctonia Root Rot.
Phytophthora Dieback, Phytophthora cactorum: The oomycete, or water mold, Phytophthora causes one of the most common disease problems in the landscape for rhododendrons and azaleas. This oomycete is a "water mold," and thrives in poorly drained or wet conditions. A wilted plant is usually the first sign of trouble. Rhododendron leaves will curl inward and droop. Drought can cause similar symptoms. Roots of affected plants appear soggy or blackened, and the outer portion of the root easily pulls away from the inner portion. Crown rot causes the lower portions of the stem to have a brown discoloration of the wood near the soil line. This disease is favored in poorly drained areas or when plants are set too deeply. Plants may remain without symptoms until further stressed from drought or flooding. Azaleas. Resistant: R. sanctum, R. simsii (Indian azalea), R. yedoense var. poukhanense (Korean azalea), 'Corrine,' 'Fakir,' 'Fred Cochran,' 'Glacier,' 'Hampton Beauty,' 'Higasa,' 'Merlin,' 'Polar Sea,' 'Rose Greeley'. Moderately resistant: 'Alaska,' 'Chimes,' 'Eikan,' 'Jan Cochran,' 'Morning Glow,' 'New White,' 'Pink Gumpo,' 'Pink Supreme,' 'Rachel Cunningham,' 'Red Wing,' 'Shinkigen,' 'Sweetheart Supreme'. Rhododendrons. Resistant: 'Caroline,' 'Martha Isaacson,' 'Pink Trumpet,' 'Prof. Hugo de Vries,' 'Red Head,' R. davidsonianum, R. delavayi, R. glomerulatum, R. hyperythrum, R. lapponicum, R. occidentale, R. poukhanense, R. pseudochrysanthum, R. quinquefolium and R. websterianum. Do not set new plants any deeper than the original soil level. Ensure the root collar is exposed and free of soil and mulch. Rhododendrons and azaleas are subject to collar rot when root flares are buried. When planting in poorly drained soils create raised beds or provide sub-surface drainage. Plant with the root collar exposed. If soil is compacted, prepare planting area by cultivating and incorporating organic matter. Firm the soil slightly at the base of the planting hole to prevent the plant from settling into the bed. Also, keep the mulch back 2 to 3 inches from the stem. Do not plant azalea and rhododendron plants into sites where plants have previously died from root rot. Even resistant plants may succumb under these conditions. The oomycete survives in the soil and cannot be eradicated once an area is infected. Also see Phomopsis Dieback, Phytophthora Root Rot and Rhizoctonia Root Rot. Return to Top
Phytophthora Root Rot, Phytophthora cinnamomi: This is a serious, widespread and difficult-to-control oomycete, or water mold, affecting a wide range of plants . The symptoms of Phytophthora root rot vary with the cultivar. Some cultivars fail to grow or grow very slowly with pale green foliage and may die after several years. Others suddenly wilt and die within a few weeks. Roots are reddish-brown, brittle and often limited to the upper portion of the media in a container or very close to the soil surface (upper 2 inches). The reddish-brown discoloration advances to the larger roots and eventually to the lower part of the main stem. Phytophthora root rot is favored by high soil moisture and warm soil temperatures. The disease does not occur as frequently and may not be as severe on well-drained sandy soils as in heavy clays or poorly drained soils, etc. The disease is common and severe in areas where run-off water, rainwater from roofs, etc. collects around plant roots. Setting woody plants deeper than the soil level in the nursery or container, over-watering plants, or long periods of heavy rain also favor disease develop especially in shallow soils with underlying rock or compacted hard pans. Phytophthora root rot must be prevented as chemicals are often ineffective in controlling this disease after aboveground symptoms appear. Also see Phomopsis Dieback,Phytophthora Dieback and Rhizoctonia Root Rot.
Powdery Mildew, Microsphaera azaleae sometimes exhibits the typical white powdery or fuzzy growth, but often takes on a completely different appearance. This typical form is more prevalent on deciduous azaleas and sometimes it affects the lower surface more. It is more severe on shaded plants and is worse in crowded planting in damp locations. It is more severe in periods of cool, moist weather. It can be controlled with fungicides, but it is much easier to grow mildew–resistant cultivars. When buying deciduous azaleas always look for those specifically mentioning mildew resistance. The native American azaleas are among the most powdery mildew resistant, especially R. arborescens, R. canadense, R. canescens, and R. vaseyi. Among hybride deciduous azaleas, ‘Millennium’, ‘Parade’, ‘Tri-Lights’, ‘Lemon Lights’, ‘Fragrant Star’, ‘Mandarin Lights’, ‘Northern Hi-Lights’, and ‘Snowbird’ show good powdery mildew resistance.
On rhododendrons, light green or yellowish patches on leaves sometimes accompanied by brown spots on the backside of leaves are signs of powdery mildew. Unfortunately, any two different affected rhododendrons vary in appearance. The rhododendron cultivar 'Unique,' for instance, shows almost no upper leaf changes, other than occasional very faint lighter yellowish areas, while the underside of the leaves will be completely covered in brown spots. Another cultivar, 'Virginia Richards,' gets brownish purple spots on both tops and bottoms of leaves. Some cultivars are more vulnerable including 'Elizabeth,' 'Lady Chamberlain, ' 'Unique,' 'Virginia Richards,' 'Seta,' and 'Mrs. G.W. Leak.' Many rhododendrons, if basically healthy, will coexist with the disease and seem to outgrow or at least survive the symptoms.
Rhododendron Powdery Mildew
Rhododendron Powdery Mildew
Deciduous Azalea Powdery Mildew
[Photos courtesy of Harold Greer]
Although the symptoms for powdery mildew are different for azaleas and rhododendrons, the organism and control are the same. If you notice the symptoms on last year's leaves, consider protecting the new growth with a fungicide. Apply it to the new growth as it expands, before symptoms appear on this spring's leaves. Fungicides won't get rid of the existing problem on old leaves. A new fungicide, 'Remedy,' which is a potassium bicarbonate (made by Bonide Company), is registered for the problem. Thorough leaf coverage is necessary with all fungicides. Fungicides containing sulfur (such as Safer Garden Fungicide RTU) are also registered but should not be used when the temperature is over 85F or within a few weeks of an oil spray. Others are Funginex (sold as Ortho RosePride Funginex Rose and Shrub Disease Control Concentrate.) Be very careful to read all label instructions, and wear protective goggles and gloves. Funginex can be corrosive to eyes. Return to Top
Rhizoctonia Root Rot, Rhizoctonia solani: Rhizoctonia solani is widespread and causes more trouble with rhododendrons than is generally realized. Rhizoctonia can kill small or large bushes or just keep them in poor condition. Symptoms may include small necrotic spots on leaves that later become dark brown or black. Defoliation follows severe leaf spotting. The fungus is omnipresent in the soil and appears to be most virulent at high humidity levels. Microscopic examination of roots and crown are the surest diagnosis. Cultural practices to control this disease include improvement of drainage and avoidance of excess irrigation. Also see Phomopsis Dieback, Phytophthora Dieback and Phytophthora Root Rot.
Rhizoctonia Web Blight causes dieback of interior leaves of compact tightly-growing azaleas within irrigated landscape beds. Rhizoctonia web blight is often seen during the warmer, humid summer months. Infection begins in the interior of the plant as the fungus survives in the soil or container rooting medium. Infected leaves develop brown lesions and eventually the entire leaf will brown and separate from the stem. The affected leaves often remain matted together by the fungus's web-like growth (hyphae) that holds the brown leaves within the canopy. As the temperature cools in the fall, the fungus stops growing and the matted leaves drop from the plant. The disease is only a problem in landscape azaleas that are sprinkler irrigated. Wet foliage and high humidity favor infection. Use drip irrigation or soaker hoses to irrigate landscape beds. Also, remove fallen leaf debris from beneath plants. Fungicides can provide some control but should not be relied upon solely. Apply fungicides at the first sign of disease and continue through the summer months.
The Department of Agriculture Research Service has found a prevention. Plant pathologist Warren Copes found placing the cuttings in water at 122 degrees Fahrenheit for 20 minutes is the most effective method to eliminate Rhizoctonia without damaging the plant, thus eliminating the need for fungicide treatment. The pathogen can be eliminated in less time when placed in water at higher temperature, but the risk of damaging the cutting increases. According to Copes, there is still potential for the cuttings to be re-contaminated in other areas of the production process. He is trying to identify which steps pose the most risk for re-contamination, with the goal of maximizing control of this fungal disease with the least amount of effort and expense for producers.
Twig Blight, Seifertia azaleae: Azalea and rhododendron branches can be affected by this disease. The disease is characterized by a gray powdery fungal growth over the flower. A mass of gray spores may be produced on the leaf and branches surface. Infected shoots bend over at the lesion and may remain crooked or die back. Purple varieties are more susceptible to this disease. True resistance is not available as this is an opportunistic pathogen. To help reduce disease incidence, growers adjust plant spacing to reduce humidity and increase air circulation. It is similar to Altenaria Blight and Botrytis Blight.Return to Top
Insect Pests
Azalea Bark Scale, Eriococcus azalea: This insect prefers azalea or rhododendron but can infest andromeda, maple, willow, poplar and other plants. Females are approximately 1/8-inch long White felt-like sacs are secreted in May that enclose the body and eggs. Eggs are laid in the spring and hatch from late-June to mid-July. These mobile immatures are known as "crawlers". The crawlers like to attach to the bark and feed in crevices and branch forks. This pest over-winters as a nymph (immature). There is one generation per year. Over-wintering nymphs are about 1/16 inch long, gray, and can usually be found in twig forks. Scales insert their piercing-sucking mouthparts into the plant and feed on the juices. Azaleas can tolerate low numbers of these insects. These scales excrete a sticky, sweet liquid called "honeydew" which promotes the growth of black sooty mold fungus on contaminated surfaces. Honeydew, sooty mold and leaf yellowing with dieback are signs associated with infestation by this insect. Beneficial insects often control this insect. Light pruning or dormant oil may be used to suppress over-wintering nymphs on twigs. Dormant oils and insecticidal soap may be used to control crawlers that emerge from eggs. Beneficial insects often control this pest. [Photo courtesy of Harold Greer] Also see Cottony Azalea Scale.
Azalea Leafminers, Caloptilia azaleella: (also known as azalea leafroller) The insect is a small yellow caterpillar 1/2" long. It first lives in the leaf. However, before completing its feeding stage, it leaves the interior of the leaf, folds over the margin and continues feeding on the surface. Injured leaves turn yellow and drop. When mature the larva moves to a new leaf, rolls it into a case and pupates. This insect probably over-winters as a pupae or partially grown larvae. The golden adult moth is about 1/2" long and very secretive. Eggs are laid singly on the underside of a leaf near the midvein. Among the compounds registered for control of this pest in Connecticut are malathion or acephate sprays, applied in June, for control of the larvae. Imidacloprid applied to the soil as a systemic can provide season-long control. Consult the label for dosage rates and safety precautions. [Photo courtesy of Harold Greer] Return to Top
Black Vine Weevil, Otiorhynchus sulcatus and Strawberry Root Weevil, Otiorhynchus ovatus: Adult snout beetles are 3/8-inch long, black, with small yellow spots on the back. All adults are females capable of laying as many as 500 eggs. These eggs are laid in the soil. Adults are seldom seen because they feed on the foliage at night and hide in plant debris or in the soil during the day. The larvae are inch long, white and legless grubs. This pest over-winters as larvae in the soil; the adults emerge in early June. There is one generation per year. The adults feed at night by notching the leaves. This damage is seldom serious. The grubs or larvae can be highly destructive since they feed on the roots from mid-summer into late fall and again in the spring. In heavy infestations, most of the small feeder roots are destroyed; larger roots and crowns may be girdled. As a result, there is little or no plant growth, the foliage is often yellowed and may dry out. This pest is difficult to control since it is nocturnal and every adult is capable of reproduction. Larvacidal drenches may be used to kill them but are of limited effectiveness. Foliar sprays are very effective at controlling adult weevils when leaf notching starts. Foliar sprays must be repeated until no adults emerge. Orthene gives good control when applied as a foliar spray and drench. Foliar sprays must be repeated until no adults emerge. Orthene gives good control when applied as a foliar spray and drench. Since weevils can't fly and spend part of each day in the soil or mulch and part of each day feeding, you can paint the trunks with Tanglefoot to stop them, but make sure no branches are touching the ground. Some people report that keeping the mulch layer away from the trunk reduces weevil damage if they make sure no branches are touching the ground. [Photos courtesy of Harold Greer] Also see Twobanded Japanese Weevil.
Cottony Azalea Scale, Pulvinaria floccifera: Adult female scale has a fluted cottony egg sac secreted from the body of the scale. It occurs on camellia, English ivy, euonymous, holly, hydrangea, maple, mulberry, pittosporum, rhododendron, yew, and other ornamental plants. Eggs in the egg sac hatch into six-legged "crawler" stages than move onto larger twigs and branches. They develop through several stages before becoming adults. They retain their legs and are able to move throughout their development. Developing stages suck sap from the host plants, resulting in reduced plant vigor, defoliation and dieback of twigs and branches. Adults are unsightly and produce large quantities of honeydew on which the sooty mold fungus grows, turning infested plants of parts black. Also see Azalea Bark Scale.Return to Top
Cranberry Rootworm, Rhadopterus picipes: Shiny and black with a greenish sheen, these beetles are about 3/16 inch long. They feed at night and hide in litter or under containers during the day. Beetles damage leaves by chewing oval-shaped holes. They are usually associated with container nursery stock in areas with dense shade. Remove ground litter and weeds from the area and reduce shade where possible. Treat late in the day and repeat once or twice weekly.
Long-tailed Mealybug, Pseudococcus longispinus: Small cottony masses with long, waxy filaments extending from one end is a symptom of the long-tailed mealybug, Pseudococcus longispinus, which is a sucking insect that colonizes on the least accessible parts of plants. Since it is hard to see, systemic insecticides are preferred, but thorough treatment with a contact insecticide may provide control. Infested plants will have honeydew and sooty mold (black coating) on the leaves. Terminal leaves may become yellow and distorted, and dieback may occur. Infested plants are usually growing in sheltered locations, such as against south facing walls. The mealybugs may be found on lower leaf surfaces and stems. Adult mealybugs are about 1/8 inch long, and covered with white wax. The body margin is ringed with white wax filaments, with the last pair over 1/2 the length of the body. Immature mealybugs have short wax filaments. This mealybug feeds on pyracantha, holly, yew, and rhododendron. There are two to three generations a year, and the immatures over-winter on the bark. Inspect plants for beneficial predators such as ladybird beetles. Some immature ladybird beetles may resemble the mealybugs, but move faster. If the mealybug problem persists, ant control may be necessary. Ants feed on the honeydew secreted by the mealybugs and protect them from parasites and predators. Return to Top
Red-headed Azalea Caterpillar, Datana major: These caterpillars are black with rows of white or pale yellow spots, reddish brown legs, head and neck area and are 2 1/2 inches when mature. Preferred host plants are azaleas, but they may also attack witch hazel, sumac, apple, red oak and andromeda. The caterpillars feed together when young and disperse as they mature. Branches or entire plants may be defoliated. Damage occurs in late summer and fall. Control: Look for caterpillars when defoliation damage occurs, and if only a few caterpillars are present, pick them off by hand. If needed, spray shrubs with B.t. (Bacillus thuringiensis), a microbial insecticide that is specific for caterpillars. It is sold under various trade names including Caterpillar Attack, Thuricide, Dipel, etc. Apply sprays when caterpillars are numerous and less than 3/4 of an inch long. Larger caterpillars must be sprayed with a registered residual insecticide. [Photo courtesy of Harold Greer]
Rhododendron Aphid: Small, numerous, green insects winged or wingless with a pair of "bumps" or projections (cornicles) on top of their rear ends. Aphids are usually more of a problem in greenhouse stock.
Rhododendron Borer, Synanthedon rhododendri: The adults of this pest are day-flying moths that resemble wasps or yellow jackets. They are approximately 1/4-inch long, making them the smallest clear-wing borer. The wings are mostly clear, and the body is black with three yellow abdominal bands. Adults appear in late-May into June and females lay eggs on the twigs. Upon hatching, the small grub-like caterpillars, with white bodies and dark heads, bore into the inner bark, and later the sapwood, of the main stems and branches. This pest over-winters in the burrows as a inch long mature larva. There is one generation per year. The boring activities of the larvae cause wilted, off-color foliage, reduced growth and dead branches. Prune and destroy wilting branches in late summer or early spring. Also see Rhododendron Stem Borer, Oberea myopsReturn to Top
Rhododendron Gall Midge, Clinodiplosis rhododendri: Clinodiplosis rhododendri usually over-winters in the soil as a prepupa. Pupation occurs in spring, with the adult midge emerging just as the hosts begin vegetative growth. There may be two additional generations yearly corresponding with flushes of rhododendron growth. Eggs are laid in clusters on the undersurfaces of leaves that are emerging from buds. Larval feeding causes a downward and inward rolling of leaf margins. Larvae mature in about seven days, drop to the ground, burrow in and make a cocoon. Also see Gall (fungal).
Rhododendron Lace Bugs, Stephanitis rhododendri, and Azalea Lace Bugs, Stephanitis pyrioides: Adults are about 1/8-inch long. The body is pale yellow. The lacy wings (very distinctive) are held flat over the back and are transparent with two dark spots present. The nymphs are black, spiny and smaller than the adults. The eggs over-winter partially embedded in leaf tissue. The eggs hatch in May. The nymphs mature into adults in June and lay eggs during late June and July. The second generation of nymphs appears in August. The over-wintering eggs will be laid when these nymphs become adults. adults and nymphs feed on the undersides of leaves by piercing the leaves with their mouthparts and sucking the plant juices. This causes a mottled, silvery or white discoloration, known as stippling, on top of the leaf where the chlorophyll has been removed. The undersides of leaves are covered with dark brown to black, sticky spots of excrement. Plant rhododendrons in shade to maximize the activities of beneficial insects. [Photo courtesy of Harold Greer] Return to Top
Rhododendron Stem Borer, Oberea myops, or Dogwood Twig Borer, Oberea tripunctator: Adults are dark-colored beetles that are about 5/8 inch long. They have long antennae and are pale yellow with two black spots behind the head. In late June to early July, female beetles lay their eggs in new shoots several inches below the bud. The larvae emerge, bore into and down the interior of the twig where they over-winter. The following year, the larvae continue to bore downward where they over-winter in the roots. Adults are present every year, but each insect takes two years to complete a life cycle. Adult beetles feed on the undersides of leaves along the midveins, causing the leaves to curl. Boring by the larvae causes wilting and eventual dieback of individual canes. Prune and destroy wilting branches. Also see Rhododendron Borer, Synanthedon rhododendri
Rhododendron Whitefly, Dialeurodes chittendeni andAzalea Whitefly, Pealius azaleae: The adults are powdery white insects about 1/16-inch long that look like tiny moths. Clouds of adults may take to flight if an infested plant is disturbed. Females lay eggs on the undersides of leaves, and when the nymphs hatch, they attach to the foliage and feed for the duration of their immature lives. They over-winter as black, flattened, oval immature insects with a white border. There are two or more generations per year. Nymphs remove plant juices with piercing-sucking mouth parts. Heavily infested foliage takes on a yellow, mottled appearance. The immatures also produce honeydew that may lead to the development of black sooty mold fungus growth. This discolors the plant and can reach levels that interfere with photosynthesis. This pest can be difficult to control because all of the life stages are usually present at the same time, and the eggs and pupae are not susceptible to most insecticides. Rhododendron varieties that have thick, leathery leaves often escape infestation. They are generally considered a pest and not threatening. If the infestation is light, little or no plant symptoms are evident, and if beneficial insects are present, one can spray the undersides of leaves with insecticidal soap or a horticultural oil at the 2% summer rate. If the infestation is heavy use a registered residual insecticide such as Malathion, Diazinon or Orthene. Dick Murcott had a simple remedy to control the numbers of white flies. He would hang pieces of stiff plastic or 12" square metal sheets painted with a bright yellow/orange paint and then covered with petroleum jelly or any clear, sticky material. The white flies will fly to the colored material and get stuck in the sticky stuff! Return to Top
Thrips, Thrips imaginis: This insect is a seasonal pest, causing most damage in mid to late summer. Signs of damage include silvery white discoloration on the leaf's upper surface and silvery on the bottom with small black frass specks. The damage is similar to that from lace bugs. Thrips are a problem in warm and dry climates like California and New Zealand. Most of the standard insecticides and insecticidal soaps can be used. Control for thrips whether an insecticide or insecticidal soap is a contact control and must be applied on the adults which are usually on the undersurfaces of leaves. This is most likely done in May in California when they are visible. Locally, biological controls may also be available. It is best to remove infected flowers.
Twobanded Japanese Weevil, Callirhopalus bifasciatus: Adults are about 3/16-inch long. They are thick bodied and brown to gray with two darker bands across the back. The larvae are C-shaped, 1egless, white grubs with brown heads and 1/4 inch long when mature. Eggs are laid from mid-May throughout the summer. The white eggs are laid on the inside of a folded leaf. When the larvae hatch, they drop to the ground and burrow into the soil. All stages may over-winter in the soil or under plant debris. There is one generation per year. The adults notch leaves, causing more damage to foliage than the black vine weevil. They prefer to feed on new and inner foliage. If there is a large adult population, smaller plants can be defoliated. Larvae feed on the roots and can cause discoloration, wilting and death of small plants. Most damage, however, is caused by the adults. Larvacidal drenches may be used to kill them but are of limited effectiveness. Foliar sprays are very effective at controlling adult weevils when leaf notching starts. Foliar sprays must be repeated until no adults emerge. Twobanded Japanese weevils are apparently resistant to carbaryl (Sevin), diazinon, and malathion. Orthene gives good control when applied as a foliar spray and drench. Foliar sprays must be repeated until no adults emerge. Orthene gives good control when applied as a foliar spray and drench. Since weevils can't fly and spend part of each day in the soil or mulch and part of each day feeding, you can paint the trunks with Tanglefoot to stop them, but make sure no branches are touching the ground. Some people report that keeping the mulch layer away from the trunk reduces weevil damage if they make sure no branches are touching the ground. Also see Black Vine Weevil.Return to Top
Mites
Azalea White Mite, Eotetranychus clitusand Southern Red Mite, Oligonychus ilicis: Adult mites are very small, about the size of a period. They are oval shaped, reddish colored, with eight legs. The immatures appear the same, only a little smaller and with six legs. The red eggs over-winter on the undersides of leaves. There are several generations per year. Most activity takes place during the cooler weather of spring and fall. During the heat of summer, the life cycle is in the egg stage. Leaf damage is visible as white stippling damage on both sides of the leaf. In a heavy infestation, the leaves will turn brown, die and may drop off the plant. The undersides of the leaves are often coated with hatched egg shells and shed skins from molted mites. When tapping the foliage onto paper, look for the extremely small, long-legged, light-colored beneficial mites which move quicker than the southern red mites. They may be able to control the pest population. Dormant oil can be used if there is a large number of over-wintering eggs. Certain oil formulations can be used in the summer. Other possible chemicals are avermectin, oxythioquinox and dicofol. Also see Two Spotted Spider Mite.
Two Spotted Spider Mite, Tetranychus urticae: This is the most common and destructive mite on deciduous ornamentals. It has an extremely wide host range and will feed on many varieties of trees, shrubs, flowers, weeds, fruits, greenhouse and field crops. Immatures and adults are yellowish to greenish with two dark spots on either side of the body. Eggs are spherical and translucent. Strands of webbing are spun by the mites on the undersides of infested leaves and between branches. Twospotted spider mites over-winter as adult females in the soil or under the bark of host plants. They become active during the spring and may feed and reproduce throughout the summer and into fall provided conditions remain favorable for plant growth. It is considered a 'warm season' mite which thrives under hot, dry summer conditions. Damaging populations seldom during wet, cool weather. The mites are especially destructive to winged euonymous (burning bush) in landscapes. Also see Azalea White Mite.
Most rhododendron and azalea problems are cultural and won't be solved by spraying with an insecticide or fungicide, or by fertilizing. For an article on common cultural problems, see "Why Is My Rhododendron or Azalea Dying?"
The following is a guide to identifying specific problems observed on rhododendrons and azaleas. After a tentative identification is made, do a search on the internet to confirm the identification and find a remedy.
When people say their plants are dying, I would have to be psychic or have a pathologist equipped with a microscope and other laboratory equipment to do a proper diagnosis. But, short of that, I will fall back on generalities about what rhododendrons and azaleas need and what they often don’t get. So here goes a one size fits all explanation:
Is It Actually Dying?
First, it helps to be able to tell when a branch is dead. If there is a green cambium layer [see photo] under the bark, that branch is alive. If there is no green cambium layer under the bark, then that branch is dead and it is best to prune such branches off and destroy since they may be diseased. One can check for this with their fingernail, or while cutting off the dead branches. Even if there are no green leaves but there is a green cambium layer under the bark, the branch is alive. Such branches have dormant buds that may open and produce leaves in the future.
Drainage and Mulching
The chief cause of rhododendron death is water, either too much or not enough. Too much causes root rot which is fatal. Too little causes dieback which kills the plant one branch at a time. Rhododendrons and most other plants like "moist well-drained soil". That makes it sound like no matter what you do you can't do it right. However, if the area has good drainage and you use mulch, it should be easy to achieve moist well-drained soil. To check for good drainage, dig a hole about 10 to 12 inches deep and fill it with water. Then after it drains, fill it again and see how long it takes to drain. If the hole drains within an hour you have good drainage. If the water has not drained out of the hole within one hour, the soil is poorly drained and you must correct the drainage problem before planting. Install a perforated pipe or drain tile in the garden, making sure that the outlet is lower than the bottom of the planting hole, or build raised beds. [The sketch by Harold Greer shows how to use a raised bed.] Rhododendrons are easy to transplant most any time. It is best to avoid transplanting when new leaves are coming out or the ground is frozen. If the drainage is OK, then you can keep the area moist with a good mulch layer. Mulches conserve water in the soil, insulate roots against summer heat and winter cold, and discourage weeds. Replenish mulches annually, as needed, to maintain a 3- to 5-inch layer on the soil surface. Keep the mulch about 3" to 4" back from the trunk/stem of the plants to avoid collar rot, bark split, rodent damage and providing shelter for weevils. Mulching does increase the risk of weevil damage. Fine-textured organic mulches such as pine straw or shredded bark are best. Fall leaves are an excellent mulch, except don’t use black walnut or butternut leaves. They have a chemical, juglone, that kills rhododendrons and azaleas. During hot dry weather, it is common to see rhododendron leaves look wilted. It they look wilted in the heat of the day, that is normal. If they look wilted in the morning, that is a sign that the plant is either too dry or dying from being too wet. It should be easy to tell which, but don't assume, check the soil with your finger. During drought periods, it may be necessary to water once in a while. A deep watering when the plant shows signs of dryness is much better than frequent watering. Only water when the plants show signs of being dry.
Improper Planting
If the soil is moist and well-drained, then the second most common problem is improper planting. Since the plants may have been planted a number of years earlier, this is a difficult area to consider. However, if a plant has not put out new green shoots in a year, it is dead and you can dig it up and look at the roots. If they are growing in a circle and strangling each other, the plant was not planted properly. You could dig up the other plants and try to open up the roots so they don't strangle each other. If necessary, cut some of the roots so they don't strangle others. If you do dig them up, never let the roots dry out. Dip them in muddy water occasionally while working on them. If the roots dry out, they will die. Also, never plant rhododendrons and azaleas near black walnut. or butternut trees. Their leaves, nut hulls, and roots produce a toxin called juglone which kills many kinds of plants including rhododendrons and azaleas. Rarefind Nursery has an excellent guide on proper planting of rhododendrons and azaleas.
Soil Nutrients and pH
The third most common cause of decline and death is improper nutrients and pH. Rhododendrons need acidic soil, a pH of between 4.5 and 6. Fortunately, rhododendrons are great pH detectors. If the leaf is green, don't worry. If the leaf is yellow with green veins, you may have a pH problem, however it could be a nutrient problem also. In any case it is chlorotic. [See the photo of a chlorotic leaf.] If the leaf is uniformly yellow, it is most likely a nitrogen deficiency and not chlorosis. There are many causes of chlorosis. Poor drainage, planting too deeply, heavy soil with poor aeration, insect or fungus damage in the root zone and lack of moisture all induce chlorosis. After these conditions are eliminated as possible causes, soil testing is in order. Chlorosis can be caused by malnutrition caused by alkalinity of the soil, potassium deficiency, calcium deficiency, iron deficiency, magnesium deficiency or too much phosphorus in the soil. Iron is most readily available in acidic soils between pH 4.5-6.0. When the soil pH is above 6.5, iron may be present in adequate amounts, but is in an unusable form, due to an excessive amount of calcium carbonate. This can occur when plants are placed too close to cement foundations or walkways. Soil amendments that acidify the soil, such as iron sulfate or sulfur, are the best long term solution. For a quick but only temporary improvement in the appearance of the foliage, ferrous sulfate can be dissolved in water (1 ounce in 2 gallons of water) and sprinkled on the foliage. Some garden centers sell chelated iron that provides the same results. Follow the label recommendations for mixing and applying chelated iron. A combination of acidification with sulfur and iron supplements such as chelated iron or iron sulfate will usually treat this problem. Chlorosis caused by magnesium deficiency is initially the same as iron, but progresses to form reddish purple blotches and marginal leaf necrosis (browning of leaf edges). Epsom salts is a good source of supplemental magnesium. Chlorosis can also be caused by nitrogen toxicity (usually caused by nitrate fertilizers) or other conditions that damage the roots such as root rot, severe cutting of the roots, root weevils or root death caused by extreme amounts of fertilizer. In any case, never use aluminum sulfate. Although garden centers sell it and it is great for hydrangeas, it will kill rhododendrons and azaleas if used repeatedly. Also never use fertilizers with chemical nitrogen. Always use a good rhododendron and azalea fertilizer with organic nitrogen like HollyTone. Also, always fertilize in the spring and at half the rate on the package.
Insects and Fungi
The least common cause of decline and death is insects and fungi, things that you can spray for. The most common causes are cultural, things that arise because of where and how the plant was planted. Proper care at planting will usually prevent problems later on due to insects or fungi. One common insect problem that can be avoided is Lace Bugs. [See photo of Lace Bug damage on the underside of a leaf.] Some rhododendrons and azaleas are susceptible to Lace Bug damage. However, this problem can be averted by planting such plants in areas with partial shade. Natural enemies of Lace Bug can keep them in check if the plant doesn’t receive too much sun.
For other problems check out my online Guide to Common Problems & Their Solutions.
Other Resources
Realize that the local extension service can test soil samples and look at samples of diseased plant material to check for problems. Also, you can find varieties of plants that do well in your area. Unfortunately, some local garden centers stock plants based upon sales appeal rather than on whether they are appropriate for the immediate area. Lists of plants that are known to do well are available in the ARS website’s Proven Performer Lists.
Drought or Borers can cause Entire portions of a plant die:
Drought can cause entire branches or entire plants to die. We have had several years of drought here and we observe that if rhododendrons and azaleas are not watered during a drought some plants will die, but others will just have one section of the plant die. It seems to be the plants way to conserve what little moisture it has. Prolonged drought weakens plants and often results in the appearance of fungal cankers on the branches of older azaleas. Look for branches that wilt in hot, dry weather in late summer and be sure to water azaleas if drought drags on more than a few weeks. Prune out the affected branches to stop the spread of fungal canker diseases.
If a Rhododendron Stem Borer, Oberea myops; Dogwood Twig Borer, Oberea tripunctator; or Rhododendron Borer, Synanthedon rhododendri, is in a branch, the entire portions of a plant beyond (away from the roots) will wilt and die. Borers only affect the portion of the plant away from the roots from the borer. If the borer is in the main trunk, then the entire plant will wilt and die. The plant can be save by cutting off the area with the borer and letting the plant regenerate from the roots. There are no conventional insecticides that will kill stem borer larvae once they are inside the branches. The best control option for homeowners with only a few plants is to prune out and destroy wilting branches in early spring or late summer. [Return to Problem Menu]
Bark split is most commonly caused by an early autumn frost while the sap is still high in the plant, or a late spring frost when the sap has already started to rise. For this reason it is dangerous to feed nitrogen to a rhododendron or azalea that could stimulate growth through to autumn. Don't use nitrogen after mid-June. When the sap freezes, it expands and ruptures the tissue under the bark and splits the bark. For this reason always keep mulch away from the trunk of plants. Bark split damage can be treated with grafting wax to prevent fungal and insect damage. If left untreated, it is fatal. [Photo courtesy of Harold Greer] [Return to Problem Menu]
Leaf droop and curl is normal in most rhododendrons when they are exposed to extreme cold. Leaf droop is also caused by extreme heat, extreme cold, or drought. It is a natural reaction that helps prevent desiccation under these conditions of extreme stress. The roll and droop should go away when the extreme condition is absent. In hot weather, the droop occurs naturally in the heat of the day. If should go away by the next morning. If it doesn't, the ground is probably dry. However, since the same condition can be caused by root fungi which thrive in warm moist conditions, it is important not to over-water. If the soil is truly dry, then a deep watering in needed. Sandy soils require more irrigation. The soil should not remain wet. [Photo courtesy of Harold Greer] [Return to Problem Menu]
Plants wilt and die slowly when their roots become compromised. There are several causes of this:
Root strangulation. This is best prevented by proper root pruning when planting. If the plant is not too far gone, it might be rescued by digging and removing the soil. Then cutting any circling roots that may be strangling other roots. The roots need to be opened up. On larger plants, some of the top must be removed to compensate for the weak state of the roots. Any time the roots are exposed, they must be kept moistened. Roots that dry out will die.
Phytophthora Root Rotor wilt. This root rot is the major killer of rhododendrons and azaleas. It develops when roots are growing in wet conditions. The rot is more prevalent in warm summer conditions. Plants infected with crown rot or collar rot caused by the oomycete, or water mold, Phytophthora have roots that become clogged with brown oomycete, or water mold, internally. The roots get blocked and the plant wilts and dies. There is not much of any cure for crown rot or collar rot. Some varieties of rhododendrons are vulnerable (Chionoides, Catawbiense Album, Nova Zembla) and some are resistant (Roseum Elegans, Scintillation, PJM). Sphagnum moss and bark dust combined with good drainage seem to prevent crown rot or collar rot, but do not cure it. Also, be sure to keep the mulch back 2 to 3 inches from the stem to prevent crown rot or collar rot.
Drought. It may have simply dried out. If you plant rhododendrons or azaleas in late spring, it is very important to give them some extra water while they are growing new roots. Never let the soil completely dry out' it's best to keep the soil evenly moist. Too much water or poorly drained soil might be another explanation of sudden rhododendron or azalea death. Rhododendrons and azaleas have very fine, fibrous roots that are easily damaged by water-logging, even for short periods of time.
Voles. Voles, also known as meadow mice, may have chewed on the bark and roots near the crown of the plant. Sometimes they chew all the way around the trunk and kill the inner bark, resulting in death of the whole plant. Keep mulch away from the trunk to discourage voles.
Bark Split. The bark may also split when there are wide fluctuations in temperature in the winter. Rhododendrons and azaleas may begin to come out of dormancy if late winter weather is warm; if a cold snap follows, bark injury is likely, especially in sunny, exposed sites. [Return to Problem Menu]
Plants wilt and die suddenly is usually caused by roots that are girdled by larvae of the Black Vine Weevil, Otiorhynchus sulcatus, Strawberry Root Weevil, Otiorhynchus ovatus, or Twobanded Japanese Weevil, Callirhopalus bifasciatus. Adult weevils feed on the leaves at night except the Twobanded Japanese Weevil which feed during the day. Specimens may be collected during the day or at night for identification depending upon the weevil. The major damage is caused by weevil larvae that girdle the roots and kill the plant. Larvacidal drenches may be used to kill them but are of limited effectiveness. Foliar sprays are very effective at controlling adult weevils when leaf notching starts. Foliar sprays must be repeated until no adults emerge. Twobanded Japanese weevils are apparently resistant to carbaryl (Sevin), diazinon, and malathion. Orthene gives good control when applied as a foliar spray and drench. Foliar sprays must be repeated until no adults emerge. Orthene gives good control when applied as a foliar spray and drench. Since weevils can't fly and spend part of each day in the soil or mulch and part of each day feeding, you can paint the trunks with Tanglefoot to stop them, but make sure no branches are touching the ground. Some people report that keeping the mulch layer away from the trunk reduces weevil damage if they make sure no branches are touching the ground. [Return to Problem Menu]
Sooty mold growth on stems and petioles is a symptom of Azalea Bark Scale, Eriococcus azalea, and Cottony Azalea Scale, Pulvinaria floccifera. These small sucking insects feed on the bark and exude a sticky substance that turns the stems black. A scale infestation is indicated by sooty mold on leaves, yellowing of leaves, and twig dieback. This scale is most obvious from May through June when white egg sacs may be found in twig forks. Heavy infestations over several seasons may kill plants. Over-wintering immature scales (nymphs) are about 2 mm long, gray, and are usually found in twig forks. This scale primarily attacks azalea and rhododendron, but has also been found on andromeda, maple, arborvitae, willow, poplar, and hackberry. Azaleas can tolerate low populations of this scale without injury, and if there are no yellowing leaves, no treatment is necessary. Beneficial predators and parasites will usually provide adequate control of light scale infestations. Examine egg sacs for holes which indicate control by parasites, and look for predators such as ladybird beetles. To control heavy infestations, spray dormant plants with a late oil spray to kill developing nymphs on twigs. If necessary a 2% summer rate of horticultural oil may be applied in July after all of the eggs have hatched.
No new growth. It is normal for rhododendrons and azaleas to have new growth every spring. However, this won't happen if the plant is not healthy and doesn't have enough light. Light is necessary to encourage bud formation for both flowers and foliage. Low light encourages upward, tall, gangly growth. However if the light is too low, the plant has no vigor. Also, proper nutrition, drainage, pH, and moisture are necessary for general plant vigor. [Return to Problem Menu]
Problems of Flowers
Bud blast - buds covered by short hair-like structures is a symptom of the fungal disease Seifertia azaleae, but may also be caused by a late frost or application of a nitrogen containing fertilizer too late in the season which prevents the buds from hardening off. In all cases the buds turn brown or black. If it is a Seifertia azaleae(or Pycnostysanus or Briosia azaleaea) infection, the dead bud will be covered with short hair-like structures. Seifertia azaleae is best controlled by sanitation, but may be reduced by spraying buds with fungicide. Avoid application of nitrogen after late spring, but phosphorus and potassium may be applied during the growing season. [Return to Problem Menu]
Failure to set flower buds may be a sign of too much health and vigor in a plant. One solution my be to prune the roots by cutting around the plant with a spade or moving the plant. This will check foliage growth and encourage production of flower buds. Application of nitrogen rich fertilizers is the main cause of vigor which suppresses flower bud production. Deadheading flowers as soon as they wilt can promote flower bud production. Too much shade, a cool wet summer, or inadequate phosphorus or potassium in the soil may also suppress flower bud production. There are a number of other reasons for a lack of flowers. The effect of each variable depends upon the variety of the plant. The effects include:
Pruning. The buds are formed in late summer and early fall so pruning then or later is not advisable since it will remove flower buds. New leaf buds will form in the spring, but new flower buds won't form until the next year.
Variety. Some plants will never bloom. Some rhododendrons that come from the seed of a hybrid plant will look good but will never produce flowers or will produce very poor flowers. To come true to the parent plant, a hybrid may be propagated by cuttings or tissue culture but not from seed. A good hybrid seedling only comes about once in a while. For that reason it is important to know that you are getting a good named variety or a good species.
Fertilizing. Nitrogen promotes leaf and branch growth and discourages flower bud production. It can also force late season growth that gets killed or stunted by frost damage. Phosphorus promotes flower bud production and hardiness. Potassium is necessary for well being.
Weather. Cold weather can kill flower buds. Usually you see the brown buds in the spring. Cold spells in the fall or spring can damage buds that are not hardened off. Bud blast (blooming in fall or winter) uses up good buds which are then not available at the normal blooming time.
Age. Most rhododendrons take 2 to 3 years to bloom from a rooted cutting unless forced. Some take longer and some bloom sooner. From seeds the plant may take 1 or 2 additional years.
Sun & Shade.Some rhododendrons need full sun to bloom and others can take fairly dense shade. In general, the more sun the more flower buds but also the greater exposure to damage from desiccation in summer or winter. More shade produces tall spindly foliage and less flowers.
Inspection. You can usually tell if the plant has ever bloomed. A rhododendron that has bloomed will have the seed pods on it unless it has been dead-headed. If dead-headed too late after blooming, new flower buds can be damaged.
There are many other cultural variables that influence the plant's health and hence, its ability to produce flowers. [Return to Problem Menu]
Failure of flower buds to open could be due to a number of reasons. On a mature plant if they ever bloomed they will have a few of the seed pods still here and there. If you can't find any old seed pods, then they may have never bloomed. In any case, here are a few suggestions that may help:
Bud blast. Disease may attack the buds before they open. If it is a fungal infection, the dead bud will be covered with short hair-like structures.
Bud set.The buds could be foliage buds rather than flower buds. In this case check the previous section about flower buds not setting.
Fall Blooming. Some causes of fall blooming include a dry summer and moist fall and/or warmer climates including a warm fall. For some reason, fall blooming is more common in Georgia according to Dr. Sandra McDonald. Plants which are not sufficiently hardened off or are exposed to unseasonable warm spells can start bloom prematurely. These blooms are seldom satisfactory and many times get frozen before opening fully. In any case, the seasonal bloom is lost. Avoid application of nitrogen after late spring, but phosphorus and potassium may be applied during the growing season. Application of nitrogen too late in the season can hinder hardening off in the fall.
Low temperatures.The buds could be flower buds that froze. Early frosts are especially destructive. Plants harden off progressively in the fall. If a frost occurs before hardening is complete, the frost can kill flower buds. Late frosts in the spring after dormancy is broken are also a problem. This is especially true of early bloomers such as PJM that break dormancy very early. Cold climates may be too cold for many rhododendrons. Most rhododendrons have a low temperature at which the flower buds are damaged and will not produce flowers. It varies greatly from variety to variety and somewhat from season to season. Flower buds can also be damaged by cold, dry winds, particularly when warm winter weather is followed by a period of bitter cold.
Nutrients.Improper nutrients my be a problem that affects cold hardiness and flower bud set. A few things you can do are to fertilize with phosphorus (super-phosphate) per directions to increase hardiness and flower bud set. This can be done any time. Do not use nitrogen rich fertilizers as they may inhibit flower bud production and also reduce cold hardiness. Lawn fertilizers are notoriously high in nitrogen and should be kept away from flowering plants.
Acidity.Measure the pH and acidify if necessary. Flowers of sulfur (powdered sulfur) or iron sulfate are the best chemicals to use to increase the acidity [lower the pH]. Do not use aluminum sulfate since aluminum salts build up in the soil and eventually becomes toxic to many plants including rhododendrons and azaleas. If soil is too acid, the symptoms can be the same. Very acidic soil can prevent the roots from taking up nutrients. As many of my rhododendrons are planted in very acidic forest soil, an application of Dolomite and a light top-dressing of mushroom manure in late spring is all they need. Sprinkle the lime on in late winter, very early spring. Don't overdo it - just a light sprinkle. If it is mid-spring, get the lime on right away so the rhododendron roots will be able to take up the soil nutrients in time for new growth. If you don't have rain, water it in well.
Protection.If the plants are wrapped in burlap during the winter, they may gain a few more degrees in hardiness.
Drought. When soil moisture is too low, the buds will not open as shown in photo on the right. Watering will usually resolve this condition if detected soon enough. Also, summer drought with a moist fall can contribute to fall blooming. [Photo courtesy of Harold Greer]
Deer Damage. Deer and rabbits may eat many of the flower buds as they browse in the winter, particularly if the weather is harsh and other food is scarce. [Return to Problem Menu]
Flowers thickened or fleshy galls on flowers and leaves are caused by Exobasidium Leaf and Flower Gall, Exobasidium vaccinii, see photo on the left. The galls become hard and turn white and eventually brown. While very noticeable, these galls will not threaten the health of the plant. This problem is more common during cool and wet spring weather. The first symptoms are swollen or puffy portions on newly expanding leaves, shoots, buds or flowers. The galls range in color from green, to pink or red depending on the part of the plant infected. As these galls age they develop a white surface growth which is a layer of reproductive spores. Eventually the infected tissue will turn brown and shrivel up into hard galls. Fungicides seldom provide control. For best control, start spraying in the early spring with Ferbam or Bordeaux. Sanitation and warm dry conditions reduce infestation. It is seldom considered serious. It is most common on evergreen azaleas. [Photo courtesy of Harold Greer] [Return to Problem Menu]
Flowers exhibit small spots which enlarge rapidly and appear water-soaked is a symptom of Petal Blight,Ovulinia azaleae Petal Blight. The flowers turn brown and wilt. They remain on the plant. Wet weather in spring often results in serious damage from the petal blight fungus. Some fungicides provide control if applied when or just before flower buds open. The best fungicides are a combination of chlorothalonil and benomyl or Mancozeb or Bayleton or triadimefon. During moist seasons, control may be difficult for late blooming varieties. Sanitation practices such as deadheading and removal of diseased material my improve control. In the northwestern US, Ovulinia is present, but similar symptoms can also be caused by Botrytis cinerea which is less damaging to the flowers and easier to control. [Return to Problem Menu]
Gray growth on flowers is one of the water molds: Altenaria Blight or Botrytis Blight or Twig Blight. Little can be done other than to prune the plant to promote air circulation and sanitation. Sanitation and warm dry conditions reduce infestation. It is seldom considered serious.
Chewed flowers and new leaves can be a sign of slugs and snails. These pests feed on soft new growth and on flowers. To control, use Metaldehyde baits or sprays
A gray powdery fungal growth over the flower is caused by one of the water molds: Altenaria Blight or Botrytis Blight or Twig Blight. The fungus will kill the flower. Purple varieties are more susceptible to this disease. True resistance is not available as these are opportunistic pathogens. To help reduce disease incidence, growers adjust plant spacing to reduce humidity and increase air circulation. They can be controlled with fungicide sprays and proper sanitation by removing and disposing of all dead material.
White spots on stems and twigs are a symptom of Azalea Bark Scale, Acanthococcus azaleae. This scale is most obvious from May through June when white egg sacs may be found in twig and stems. They create white egg sacks which are easy to spot. The insect is hidden from view by the egg sac, a covering of felted or matted waxy threads. There are sprays for scale insects but the timing of spraying is critical. Adult females and eggs are protected by the egg sac from virtually any pesticide. The key to control is treatment in late spring and late fall when the nymphs are present. Imidacloprid (Bayer Advanced Garden Tree & Shrub Insect Control) applied to the soil as a systemic can provide season-long control. Heavy infestations over several seasons may kill plants. Over-wintering immature scales (nymphs) are about 2 mm long, gray, and are usually found in twig forks. This scale primarily attacks azaleas and rhododendrons, but has also been found on andromeda, maple, arborvitae, willow, poplar, and hackberry. Azaleas can tolerate low populations of this scale without injury, and if there are no yellowing leaves, no treatment is necessary. Beneficial predators and parasites will usually provide adequate control of light scale infestations. Examine egg sacs for holes which indicate control by parasites, and look for predators such as ladybird beetles.
Small cottony masses with long, waxy filaments extending from one end is a symptom of the Long-tailed Mealybug, Pseudococcus longispinus, which is a sucking insect that colonizes on the least accessible parts of plants. Since it is hard to see, systemic insecticides are preferred, but thorough treatment with a contact insecticide may provide control. Infested plants will have honeydew and sooty mold (black coating) on the leaves. Terminal leaves may become yellow and distorted, and dieback may occur. Infested plants are usually growing in sheltered locations, such as against south facing walls. The mealybugs may be found on lower leaf surfaces and stems. Adult mealybugs are about 1/8 inch long, and covered with white wax. The body margin is ringed with white wax filaments, with the last pair over 1/2 the length of the body. Immature mealybugs have short wax filaments. This mealybug feeds on pyracantha, holly, yew, and rhododendron. There are two to three generations a year, and the immatures over-winter on the bark. Inspect plants for beneficial predators such as ladybird beetles. Some immature ladybird beetles may resemble the mealybugs, but move faster. Check carefully before spraying with an insecticide. A horticultural oil may be sprayed on dormant plants to reduce the over-wintering population. A 2% summer rate of horticultural oil will reduce the numbers of mealybugs during the growing season if the coverage is thorough. If mealybugs are densely packed on leaves, spray with a systemic insecticide. If the mealybug problem persists, ant control may be necessary. Ants feed on the honeydew secreted by the mealybugs and protect them from parasites and predators. [Return to Problem Menu]
Ends of branches die when a Rhododendron Stem Borer,Oberea myops, Dogwood Twig Borer, Oberea tripunctator, or Rhododendron Borer, Synanthedon rhododendri, is in a branch. Borers only affect the portion of the plant away from the roots from the borer. If the borer is in the main trunk, then the entire plant will wilt and die. The plant can be save by cutting off the area with the borer and letting the plant regenerate from the roots. There are no conventional insecticides that will kill stem borer larvae once they are inside the branches. The best control option for homeowners with only a few plants is to prune out and destroy wilting branches in early spring or late summer. [Return to Problem Menu]
Buds and twigs becoming covered with silver-gray scales is caused by one of the water molds: Altenaria Blight or Botrytis Blight or Twig Blight and is easy to control with fungicide sprays and proper sanitation by removing and disposing of all dead material.
Leaf droop and curl is normal in most rhododendrons when they are exposed to extreme cold. Leaf droop is also caused by extreme heat, extreme cold, or drought. It is a natural reaction that helps prevent desiccation under these conditions of extreme stress. The roll and droop should go away when the extreme condition is absent. In hot weather, the droop occurs naturally in the heat of the day. If should go away by the next morning. If it doesn't, the ground is probably dry. However, since the same condition can be caused by root fungi which thrive in warm moist conditions, it is important not to over-water. If the soil is truly dry, then a deep watering in needed. Sandy soils require more irrigation. The soil should not remain wet. [Photo courtesy of Harold Greer] [Return to Problem Menu]
Phytophthora cactorumcauses the central vein of a leaf to turn brown and the discoloration extends to the petiole on tender new growth. The infection spreads outward from the midrib tissue and the leaf wilts. Infections are more severe on azaleas. Some varieties of rhododendrons are vulnerable (Chionoides, Catawbiense Album, Nova Zembla) and some are resistant (Roseum Elegans, Scintillation, PJM). Control of the disease is difficult. Since the infection goes from the roots to the tips, when you see the symptoms it is too late. To prevent it, use a raised bed with lots of sphagnum peat moss. Also, keep the mulch back 2 to 3 inches from the stem. Prevention with fungicides and careful control of exposure to high humidity may be practical. [Return to Problem Menu]
Botryosphaeria dothideacauses leaves to turn dull green and then brown and roll and droop. Cankers form on branches and may girdle the branch. This is the most common disease of rhododendron in the landscape. A typical symptom of this fungal disease is scattered dying branches on an otherwise healthy plant. Leaves on infected stems turn brown, then droop and roll inward. These leaves often lay flat against the stem and will remain attached. The pathogen can infect all ages of stem tissue through wounds, pruning cuts, and leaf scars. Heat, drought stress, and winter injury can increase disease incidence. Cankers on branches can gradually grow through the wood until the stem becomes girdled. Diseased wood is reddish brown in appearance. Discolored wood viewed in longitudinal cross section often forms a wedge that points toward the center of the stem, and the pith may be darker brown than the surrounding wood. Sanitation and applying a fungicide such as metalaxyl (Subdue) after pruning my provide some control. Plants should be grown in partial shade, with mulch and kept well watered during dry periods. All dying branches should be promptly pruned out in dry weather and all discolored wood should be removed. Plants should also be protected from rough treatment during maintenance activities to prevent unnecessary wounds. [Return to Problem Menu]
Phomopsis rhododendri symptoms vary from leaf spots to chlorosis and then browning of leaves which then wilt. Browning streaks extend down the stem to a wound. Fungicides such as metalaxyl (Subdue) should control an outbreak. Sanitation and applying a fungicide after pruning may provide control. [Return to Problem Menu]
Rhizoctonia solani: causes small necrotic spots on leaves, which later become dark brown or black. Defoliation follows severe leaf spotting. The fungus is omnipresent in the soil and appears to be most virulent at high humidity levels. Microscopic examination of roots and crown are the surest diagnosis. Cultural practices to control this disease include improvement of drainage and avoiding excess irrigation. It seems to only be present in irrigated beds such as at nurseries. Nurseries now have a way to prevent Rhizoctonia. [Return to Problem Menu]
Wind and cold damage is indicated when the edges of the leaves become distorted and turn brown. This occurs frequently in plants that may be in a colder climate than recommended or in a location with severe exposure. Provide protection from winter winds and winter sun. Note, boron poisoning or fertilizer burn will create the same symptoms except uniformly over the plant rather than just on areas exposed to the sun and wind. [Photo courtesy of Harold Greer] [Return to Problem Menu]
Large leaved rhododendrons are susceptible to sunscald if the plants do not receive enough moisture before the soil freezes. The leaves curl in cold winter weather, exposing the central part of the leaf but not the edges, resulting in the area near the main vein becomes desiccated and turns brown. To prevent this, water plants thoroughly before the first hard frost, protect from drying winds, apply mulch, and locate in partial shade [Photo courtesy of Harold Greer]. [Return to Problem Menu]
Grayish areas on a leaf may be caused by frost damage. If the plant variety is too tender or the plant has not hardened off and is hit by an early frost, this may occur. Application of fertilizer after mid-June my stimulate tender growth that is frost susceptible. [Return to Problem Menu]
Leaf spots have several origins:
Brown, reddish-brown or purplish leaf spots that occur on many cultivars, including R. 'Blue Ensign' and R. 'Mrs. G. W. Leak', are physiological and not disease caused. These spots are generally purplish and are inherent in the cultivar. Environmental stress may increase their appearance. They do no harm to the plant.
Some leaf spots are caused by a virus thought to be a potexvirus, the most common ailment being called Necrotic Ring Spot. The symptoms are reddish-brown rings or spots on the leaves. It generally occurs only on the two year leaves of a few rhododendron cultivars such as R. 'Unique', or on Kalmia latifolia. It also appears on the first year foliage of some R. 'Loderi' clones. Little is known about the disease and a does not seem to spread from one cultivar to another. No control is known or generally necessary. .
Leaf spotting can also be caused by chemical injury, such as drift from cleaners, paints, or chemicals used to kill moss on roofs as shown in the photo on the right. Sometimes the results of such injury may not show up for weeks or months. [Photo courtesy of Harold Greer]
There are a number of leaf spots or burns caused by fungi such as Botrytis cinerea, Pestalotia rhododendri, Phyllosticta, Septoria and others. Many are secondary infections happening after mechanical damage or environmental stress, such as sunburn, drought, winter damage or windburn. They generally occur during wet weather and many times are self limiting with drier weather. Good sanitation is helpful, so remove brown and fallen leaves. Also provide good air circulation. Spraying with Benomyl or similar fungicide can be useful, but is frequently not necessary.
Young Azalea Leafminers, Caloptilia azaleella: (also known as azalea leafroller) larvae tunnel inside leaves and form elongate blotches in April or May. These blotches may resemble leaf spot diseases. Older larvae exit the tunnels, curl the leaf tip and feed inside the curl. Large populations cause the leaves to turn brown and drop from the plant. [Photo courtesy of Harold Greer] [Return to Problem Menu]
If a leaf has brown areas with white spots, it probably has a local fungal infection of Pestalotia rhododendri. This is seldom controlled with fungicides and is best mitigated by good sanitation and avoiding excessive moisture. [Return to Problem Menu]
Leaves developing brown lesions and eventually the entire leaf will brown and separate from the stem is a symptom of Rhizoctonia Web Blight.Itcauses dieback of interior leaves of compact tightly-growing azaleas within irrigated landscape beds. Rhizoctonia web blight is often seen during the warmer, humid summer months. Infection begins in the interior of the plant as the fungus survives in the soil or container rooting medium. . The affected leaves often remain matted together by the fungus's web-like growth (hyphae) that holds the brown leaves within the canopy. As the temperature cools in the fall, the fungus stops growing and the matted leaves drop from the plant. The disease is only a problem in landscape azaleas that are sprinkler irrigated. Wet foliage and high humidity favor infection. Use drip irrigation or soaker hoses to irrigate landscape beds. Also, remove fallen leaf debris from beneath plants. Fungicides can provide some control but should not be relied upon solely. Apply fungicides at the first sign of disease and continue through the summer months.
Small bright yellow spots are a symptom of Azalea Rust, Pucciniastrum vaccinii, a fungal disease. Orange-red pustules containing spores form on the lower surface of the leaf. This rust is only sporadically severe and typically infects deciduous azaleas, especially the deciduous azaleas 'Klondyke', 'Peachy Keen', 'Pink William', 'Primrose', 'Rufus', and 'Sunrise'. Control by avoiding those hybrids and species that are very susceptible to rust. Good air circulation is helpful. Some deciduous azalea varieties that are resistant include 'Balzac', 'Gibraltar', and "Red Letter". Triadimefon seems to help, but may not be registered for use on rhododendrons. [Return to Problem Menu]
A grayish white, powdery coating or fuzzy white growth on upper or lower surfaces is Powdery Mildew(Microsphaera azaleae). This is more prevalent on deciduous azaleas and sometimes it affects the lower surface more. Entire leaves can be covered. In late summer and fall, small black specks may be found in the white areas. Powdery mildew is more severe on shaded plants. It is favored by the high humidity found in crowded plantings and damp locations. The disease is more severe during periods of cool, moist weather. These fungi produce spores on the surface of the infected leaves which are spread by wind currents to surrounding leaf tissue. These fungi over-winter in the bud scales for initiation of infection next season. There are a number of ways to manage this disease.
Do not over water or over fertilize plants, as the fungus prefers succulent new growth.
Hand-pick and destroy mildewed leaves to control small amounts of infection.
Hose diseased plants with water when practical. This can help remove fungus and prevent new infections.
Prune and space plantings to allow good air circulation. Do not plant in extremely shaded or damp areas.
Rake and destroy fallen leaves year-round to reduce infection source. Do not compost diseased materials.
Chemical control is possible. Begin applications when you first notice the disease on current-year leaves. If disease appears late summer, applications are not necessary on deciduous azaleas. Do not apply sulfur products when temperature is over 85F or within a few weeks of an oil spray.
Black Leaf Sulfur Dust
Bonide Lime Sulfur Spray
Bonide Remedy
Monterey Fungi-Fighter
Ortho RosePride Funginex
Ortho RosePride Orthenex
Safer Flower, Fruit & Vegetable Garden Fungicide
triadimefon (Bayleton, Strike)
Spectracide IMMUNOX
This fungal disease can weaken the plant. Spray when you first see the disease and then again in 10 days. Chemicals will not control the fungi that have already become established. For more information see the section following on 'rhododendron powdery mildew'. The symptoms are different, but the organism and control are the same. [Return to Problem Menu]
Light green or yellowish patches on leaves sometimes accompanies by brown spots on the back side of leaves is also a sign of Powdery Mildew (Microsphaera azaleae). One of the puzzling aspects of this fungal problem is the fact that two different affected rhododendrons vary in appearance. Rhododendron cultivar 'Unique,' for instance, shows almost no upper leaf changes, other than occasional very faint lighter yellowish areas, while the underside of the leaves will be completely covered in brown spots. A deep green leaf may begin to show lighter green patches, and these areas will gradually become more yellow. Another cultivar, 'Virginia Richards,' gets brownish purple spots on both tops and bottoms of leaves. This common disease is named Powdery Mildew despite how little the symptoms resemble the familiar fungal disease often seen on roses and azaleas. Usually the disease doesn't produce the familiar white powder-like spores, although late in the summer some may become visible. The disease manifests instead as color changes in the leaves, followed by defoliation toward the end of the growing season. Many rhododendrons, if basically healthy, will coexist with the disease and seem to outgrow or at least survive the symptoms. Last year's leaves, once they have been hit by the disease, will always have it, with symptoms persisting from year to year until the leaves drop off. High relative humidity at night and low relative humidity during day with 70-80 F (22-27 C) temperatures is ideal for the disease to flourish.
Keep rhododendrons healthy to help them manage this problem. If you notice symptoms on last year's leaves, consider protecting the new growth with a fungicide . Apply it now to the new growth as it expands, before symptoms appear on this spring's leaves. Fungicides won't get rid of the existing problem on old leaves. A new fungicide, 'Remedy,' which is a potassium bicarbonate (made by Bonide Company), is registered for the problem. Thorough leaf coverage is necessary with all fungicides. Fungicides containing sulfur (such as Safer Garden Fungicide RTU) are also registered. Others are Funginex (sold as Ortho RosePride Funginex Rose and Shrub Disease Control Concentrate.) Be very careful to read all label instructions, and wear protective goggles and gloves. Funginex can be corrosive to eyes. For more information see the section above on 'azalea powdery mildew'. The symptoms are different, but the organism and control are the same.
Rhododendrons that have been hybridized with Rhododendron cinnabarinum as one of the parent plants do get the disease severely. Two of those are 'Elizabeth' and 'Lady Chamberlain.' The Cornish Cross hybrids, including 'Virginia Richards,' 'Seta' and 'Mrs. G.W. Leak' seem vulnerable also. [Return to Problem Menu]
Yellowing of a leaf between dark green veins is called chlorosis and is usually caused by an iron deficiency. Many conditions can be responsible for an iron deficiency. Poor drainage, planting too deeply, heavy soil with poor aeration, insect or fungus damage in the root zone and lack of moisture all induce chlorosis. After these conditions are eliminated as possible causes, soil testing is in order. Chlorosis can be caused by malnutrition caused by alkalinity of the soil, potassium deficiency, calcium deficiency, iron deficiency, magnesium deficiency or too much phosphorus in the soil. Iron is most readily available in acidic soils between pH 4.5-6.0. When the soil pH is above 6.5, iron may be present in adequate amounts, but is in an unusable form, due to an excessive amount of calcium carbonate. This can occur when plants are placed too close to cement foundations or walkways. Soil amendments that acidify the soil, such as iron sulfate or sulfur, are the best long term solution. For a quick but only temporary improvement in the appearance of the foliage, ferrous sulfate can be dissolved in water (1 ounce in 2 gallons of water) and sprinkled on the foliage. Some garden centers sell chelated iron that provides the same results. Follow the label recommendations for mixing and applying chelated iron. A combination of acidification with sulfur and iron supplements such as chelated iron or iron sulfate will usually treat this problem. Chlorosis caused by magnesium deficiency is initially the same as iron, but progresses to form reddish purple blotches and marginal leaf necrosis (browning of leaf edges). Epsom salts is a good source of supplemental magnesium. Chlorosis can also be caused by nitrogen toxicity (usually caused by nitrate fertilizers) or other conditions that damage the roots such as root rot, severe cutting of the roots, root weevils or root death caused by extreme amounts of fertilizer. There is a tonic that remedies some cases of chlorosis. [Photo courtesy of Harold Greer] [Return to Problem Menu]
Small yellow leaves and stunted growth are signs of water stress brought on by water-logged soil or wet/dry fluctuations in soil moisture.
Yellow mottling on the upper surface of leaves and black sooty mold and transparent insects on the bottom are symptoms of Azalea Whitefly (Pealius azaleae.) andRhododendron Whitefly (Dialeurodes chittendeni.). These may also cause the following symptoms:
Small white spots on the underside of leaves and small white flies on under-surface of leaves is also an indication in infestation of Azalea Whitefly (Pealius azaleae.) andRhododendron Whitefly (Dialeurodes chittendeni.). They are more prevalent on certain varieties and on plants grown in protected areas. These small white flying insects look like an aphid with wings and suck on the underside of foliage, leaving white spots where it has been. Heavy infestations cause the margins of terminal leaves to cup. These infested leaves will eventually turn yellowish and appear wilted. The lower leaves become covered with honeydew, followed by sooty mold (a black coating). To check for the presence of whiteflies, shake the terminals of white azaleas to flush out adult whiteflies which look like tiny white moths. Examine the lower surfaces of leaves for the presence of nymphs, which are flat, yellowish green, and resemble scale insects. All stages occur on the under sides of leaves. This whitefly is usually limited to varieties of the snow azalea, Rhododendron mucronatum. If the infestation is light, little or no plant symptoms are evident, and if beneficial insects are present, spray the undersides of leaves with insecticidal soap or a horticultural oil at the 2%summer rate. If the infestation is heavy use a registered residual insecticide such as Malathion, Diazinon or Orthene. Dick Murcott had a simple remedy to control the numbers of white flies. He would hang pieces of stiff plastic or 12" square metal sheets painted with a bright yellow/orange paint and then covered with petroleum jelly or any clear, sticky material. The white flies will fly to the colored material and get stuck in the sticky stuff! [Return to Problem Menu]
Yellowing of leaves surfaces, often with brownish burned areas, occurring on leaves that are more exposed to sun, is caused by more sun exposure than the plant is able to tolerate. Some varieties need shade, while all plants that have been protected from direct sun will be tender until hardened off by gradual exposure to sun light. Possible solutions are to give the plant more shade or move it to a more protected site. [Photo courtesy of Harold Greer] [Return to Problem Menu]
Yellowing and dropping of leaves is normal toward the end of the second summer on the small-leaved lepidote rhododendrons. These should have dense enough habit that this doesn't matter. The larger-leaved elepidote rhododendrons keep their leaves for 3 or 4 seasons. Like all evergreen plants, rhododendrons and azaleas periodically lose some of their foliage, and the leaves may turn yellow, red, or purple before they fall. Often the only leaves that remain are those that surround the flower buds at the tips of the branches. This characteristic is linked to the genetics of the parents used to breed garden azaleas. The degree of leaf coloration or loss is a function of parentage and not the severity of the winter. In unusually cold winters, certain azaleas may lose more leaves than they would in mild winters. [Return to Problem Menu]
Uniformly yellowish-green leaves often indicate the need for more nitrogen. This usually indicates the need for more nitrogen. This will be more noticeable in the full sun. Some less sun tolerant varieties will always be light green in full sun. Miracle-Gro® Water Soluble Azalea, Camellia, Rhododendron Plant Food is a 30-10-10 fertilizer, high in nitrogen. I normally don't recommend this since it is not long lasting, but in this case a quick shot in spring or early summer may be what is need. Do not apply this high nitrogen fertilizer in late summer or the fall as it inhibits the plants normal tendency to harden off and prepare for winter. If this doesn't work, it would be best to move this plant to a shadier location and plant sun-tolerant plants here. There is a list of sun tolerant rhododendrons. [Photo courtesy of Harold Greer] [Return to Problem Menu]
Yellowing of leaf edges has been noted in gardens where sandy soil conditions or root competition with other plants caused insufficient soil moisture and nutrients. Usually incorporating organic material in the soil and removing the plants with the competing roots solved the problem. Care must be taken not to disturb the roots of the rhododendrons and azaleas. Hence it is best to prepare the soil adequately before planting. The tops of most competing plants can be removed leaving the offending roots in the ground and the offending roots will simply decay and pose no problem. [Return to Problem Menu]
Thrips are characterized by a silvery white discoloration on the leaf's upper surface and silvery on the bottom with small black frass specks. The damage is similar to that from lace bugs. Thrips are a problem in warm and dry climates like California and New Zealand. Most of the standard insecticides and insecticidal soaps can be used. Control for thrips whether an insecticide or insecticidal soap is a contact control and must be applied on the adults. This is most likely done in May in California when they are visible. Locally, biological controls may also be available. It is best to remove infected flowers. [Return to Problem Menu]
Whitish specks on the upper surface of leaves and dark spots varnish-like on the bottom are symptoms of Rhododendron Lace Bugs, Stephanitis rhododendri, and Azalea Lace Bugs, Stephanitis pyrioides, small insects with transparent wings on under-surface of leaves. This insect hatches early in spring as the new foliage begins to mature and its numbers may build to damaging levels with successive generations. Lace bugs reach their peak in late summer and do their worst in sunny, exposed sites. Spiders are important predators of lace bugs and since they shy away from sunny, hot places, plant your azaleas where there is some shade. Insecticidal soap, horticultural oil, or a systemic insecticide may spare your azaleas the damage if applied in spring when the first hatchlings are noticed. Care must be taken to spray the lower surfaces of the leaves where the lace bugs live. Moving a plant to an area with more shade may alleviate the problem. Lace bugs are more prevalent on certain varieties. The following azalea cultivars have resistance to azalea lace bug: 'Boldface,' 'Cavalier,' 'Cooperman,' 'Dawn,' 'Delaware Valley White,' 'Dream,' 'Elsie Lee,' 'Ereka,' 'Flame Creeper,' 'Fourth of July,' 'Gumpo White,' 'Hahn’s Red,' 'Hinocrimson,' 'Indica alba,' 'Koromo Skikibu,' 'Macrantha,' 'Marilee,' 'Mrs. G.G. Gerbing,' 'Pink Fancy,' 'Pink Star,' 'Red Wing,' 'Rosebud,' 'Salmon Beauty,' 'Salmon Pink,' 'Seigei,' 'Sunglow,' and many of the Encore Azaleas including 'Autumn Amethyst,' 'Autumn Cheer,' 'Autumn Rogue,' 'Autumn Royalty,' 'Autumn Sangria,' and 'Autumn Twist.' [Photo courtesy of Harold Greer] [Return to Problem Menu]
Cottony masses on underside of leaves are a symptom of egg masses of the Cottony Azalea Scale, Pulvinaria floccifera. They are up to 1/2 inch long. Control is the same as with other scale insects. [Return to Problem Menu]
Leaves that have chlorotic areas that turn bronze and stippled with cast skins, red eggs, and living mites on the underside are typical of spider mite infestations. Spider mites, such as Azalea White Mite (Eotetranychus clitus) and Southern Red Mite (Oligonychus ilicis)are very small red 8-legged mites about size of grain of salt. Natural enemies of mites, such as ladybird beetles (ladybugs), thrips and predaceous mites usually keep mite populations reduced. While pesticides are available, their misuse often makes the problem worse by killing off the mites' natural enemies. If the population level is low, early season mite infestations can often be controlled with insecticidal soap (such as Safer brand). Insecticidal soaps offer no residual activity, and thorough coverage of both the tops and bottoms of leaves is important. Test insecticidal soap on plants before applying to all plants. Similarly, a spray of horticultural oil (such as Sunspray Ultra-Fine Spray Oil) can help reduce infestation levels. A recommended miticide for use on azaleas is fenbutatin oxide (Ortho Systemic Insect Killer). It is best to alternate the miticides that you use to decrease the chance of mites developing resistance. As with all pesticides, read and follow all label directions and precautions. [Return to Problem Menu]
Enlarged, crabapple-like, green or pinkish galls on young leaves and flowers are caused by Exobasidium Leaf and Flower Gall. The galls become hard and turn white and eventually brown. While very noticeable, these galls will not threaten the health of the plant. This problem is more common during cool and wet spring weather. The first symptoms are swollen or puffy portions on newly expanding leaves, shoots, buds or flowers. The galls range in color from green, to pink or red depending on the part of the plant infected. As these galls age they develop a white surface growth which is a layer of reproductive spores. Eventually the infected tissue will turn brown and shrivel up into hard galls. Fungicides seldom provide control. For best control, start spraying in the early spring with Ferbam or Bordeaux. Sanitation and warm dry conditions reduce infestation. It is seldom considered serious. It is most common of evergreen azaleas. [Return to Problem Menu]
Leaves chewed on edges are a symptom of chewing insects. Most are nocturnal feeders and can be found at night with a flashlight. The most prominent chewing insects on rhododendrons and azaleas are the Black Vine Weevil, Otiorhynchus sulcatus, Strawberry Root Weevil, Otiorhynchus ovatus, or Twobanded Japanese Weevil, Callirhopalus bifasciatus. Adult weevils feed on the leaves at night except the Twobanded Japanese Weevil which feeds during the day. Specimens may be collected during the day or at night for identification depending upon the weevil. The major damage is caused by weevil larvae which girdle the roots and kill the plant. Larvacidal drenches may be used to kill them but are of limited effectiveness. Foliar sprays are very effective at controlling adult weevils when leaf notching starts. Foliar sprays must be repeated until no adults emerge. Twobanded Japanese weevils are apparently resistant to carbaryl (Sevin), diazinon, and malathion. Orthene gives good control when applied as a foliar spray and drench. Foliar sprays must be repeated until no adults emerge. Orthene gives good control when applied as a foliar spray and drench. Since weevils can't fly and spend part of each day in the soil or mulch and part of each day feeding, you can paint the trunks with Tanglefoot to stop them, but make sure no branches are touching the ground. Some people report that keeping the mulch layer away from the trunk reduces weevil damage if they make sure no branches are touching the ground.
Leaves with crescent shaped holes. The Cranberry Rootworm, Rhadopterus picipes, chews holes in the leaf, some of which are crescent shaped. [Return to Problem Menu]
Entire leaves being eaten by caterpillars is an indication of an infestation of caterpillars such as the Red-headed Azalea Caterpillar, Datana major. These caterpillars are black with rows of white or pale yellow spots, reddish brown legs, head and neck area and are 2 1/2 inches when mature. Preferred host plants are azaleas, but they may also attack witch hazel, sumac, apple, red oak and andromeda. The caterpillars feed together when young and disperse as they mature. Branches or entire plants may be defoliated. Damage occurs in late summer and fall. Look for caterpillars when defoliation damage occurs, and if only a few caterpillars are present, pick them off by hand. If needed, spray shrubs with B.t. (Bacillus thuringiensis ), a microbial insecticide that is specific for caterpillars. It is sold under various trade names including Caterpillar Attack, Thuricide, Dipel, etc. Apply sprays when caterpillars are numerous and less than 3/4 of an inch long. Larger caterpillars must be sprayed with a registered residual insecticide such as carbaryl (Sevin 50WP) or cyfluthrin (Bayer Advanced Garden Multi-Insect Killer). [Return to Problem Menu]
Other chewing insects include caterpillars, leaf rollers, sawflies (moth larvae), cut worms, and loopers. The larvae of several species of insects can cause damage as the result of chewing on new foliage. These pests hatch as the new growth is forming, and often eat out large areas of the soft growth. They may also roll the leaf with a white web. Damage only occurs on soft growth. To control, use Orthene, Malathion, or Diazinon. [Return to Problem Menu]
New foliage wilting in the heat of the day is a symptom of inadequate water. It is a natural reaction under these conditions of extreme stress. Flowers on a dry plant will sometimes start to open and then fall off without opening, as shown in the photo below. In hot weather, the wilting occurs naturally in the heat of the day. If should go away by the next morning. If it doesn't, the ground is probably dry. However, since the same condition can be caused by root fungi which thrive in warm moist conditions, it is important not to over-water. If the soil is truly dry, then a deep watering in needed. Sandy soils require more irrigation. The soil should not remain wet. Make sure the soil is getting dry before watering. Leaf wilt due to root rot is caused by too much water, so first instincts may be wrong. Check the soil before watering. [Photo courtesy of Harold Greer] [Return to Problem Menu]
Young leaves rolled and distorted could be either chemical damage or Rhododendron Gall Midge, Clinodiplosis rhododendri. Chemical damage should be associated with a chemical application (fertilizer, herbicide, deicing salt, etc.) and should affect more than one plant. The Rhododendron Gall Midge is a native pest of Rhododendron catawbiense, R. maximum and their many hybrids during the May to October growing season. The larval feeding damage from this fly can cause discoloration and distorted foliage. This damage can appear as in-rolled, twisted leaves that have turned a yellow color. This can be seen on young leaves that have separated from the bud scale. Leaves attacked in the bud stage may die if the injury is severe. Care must be taken to distinguish this pest damage from similarly manifested damage caused by leafhopper injury, chemical injury, leaf-roller activity and aphid feeding. There is no way to undo the damage once it has occurred. Control is effected by applications of insecticides with the bud break stage of rhododendron development. An alternative would be to maintain healthy plants so that they could survive any damage caused by an infestation or to prune newly-infested foliage that contain larvae. [Photo courtesy of NC State]
Distorted young leaves covered with Aphids can be a problem in the spring. These small sucking insects feed on the new growth as it begins to expand causing distorted leaf shapes. In large number, their sucking damage causes new leaves to twist and curl. A secondary problem is aphids excrete a sugar solution called "honeydew"…a perfect food source for the sooty mold fungus that grows on the honeydew causing plant leaves to look like they are covered in black soot. The fungus isn't actually parasitizing plant tissue, but it coats the leaves to such an extent that plants can't photosynthesize efficiently. In time, natural predators will help. The most famous is the ladybug, whose larval stages eat quantities of aphids. There are other predators, too. As a last resort, insecticides are available. The aphids can be controlled with Orthene, Malathion or Diazinon.
Skeletonized areas near midrib and leaf curling are indicative of Azalea Leafminers, Caloptilia azaleella. Mines and skeletonization are initially formed near the midrib. As larvae mature they curl the tips of the leaves with silk and feed inside the curl. Large populations cause leaves to brown and drop prematurely. Curled leaf tips in June indicate the completion of the first generation. The second generation mines begin in July. Adult moths are present in late June and August. The moths are 3/8 inch long and yellowish brown. Mature larvae are 1/2 inch long and yellowish brown. Azalea leafminer over-winters as pupae in leaf mines. Rake and destroy fallen leaves in the fall to remove over-wintering pupae. Infested plants may be sprayed with a registered insecticide in May if many developing blotch mines are observed. Evaluate the plants in July to determine if a second treatment is necessary. [Photo courtesy of the University of Florida]
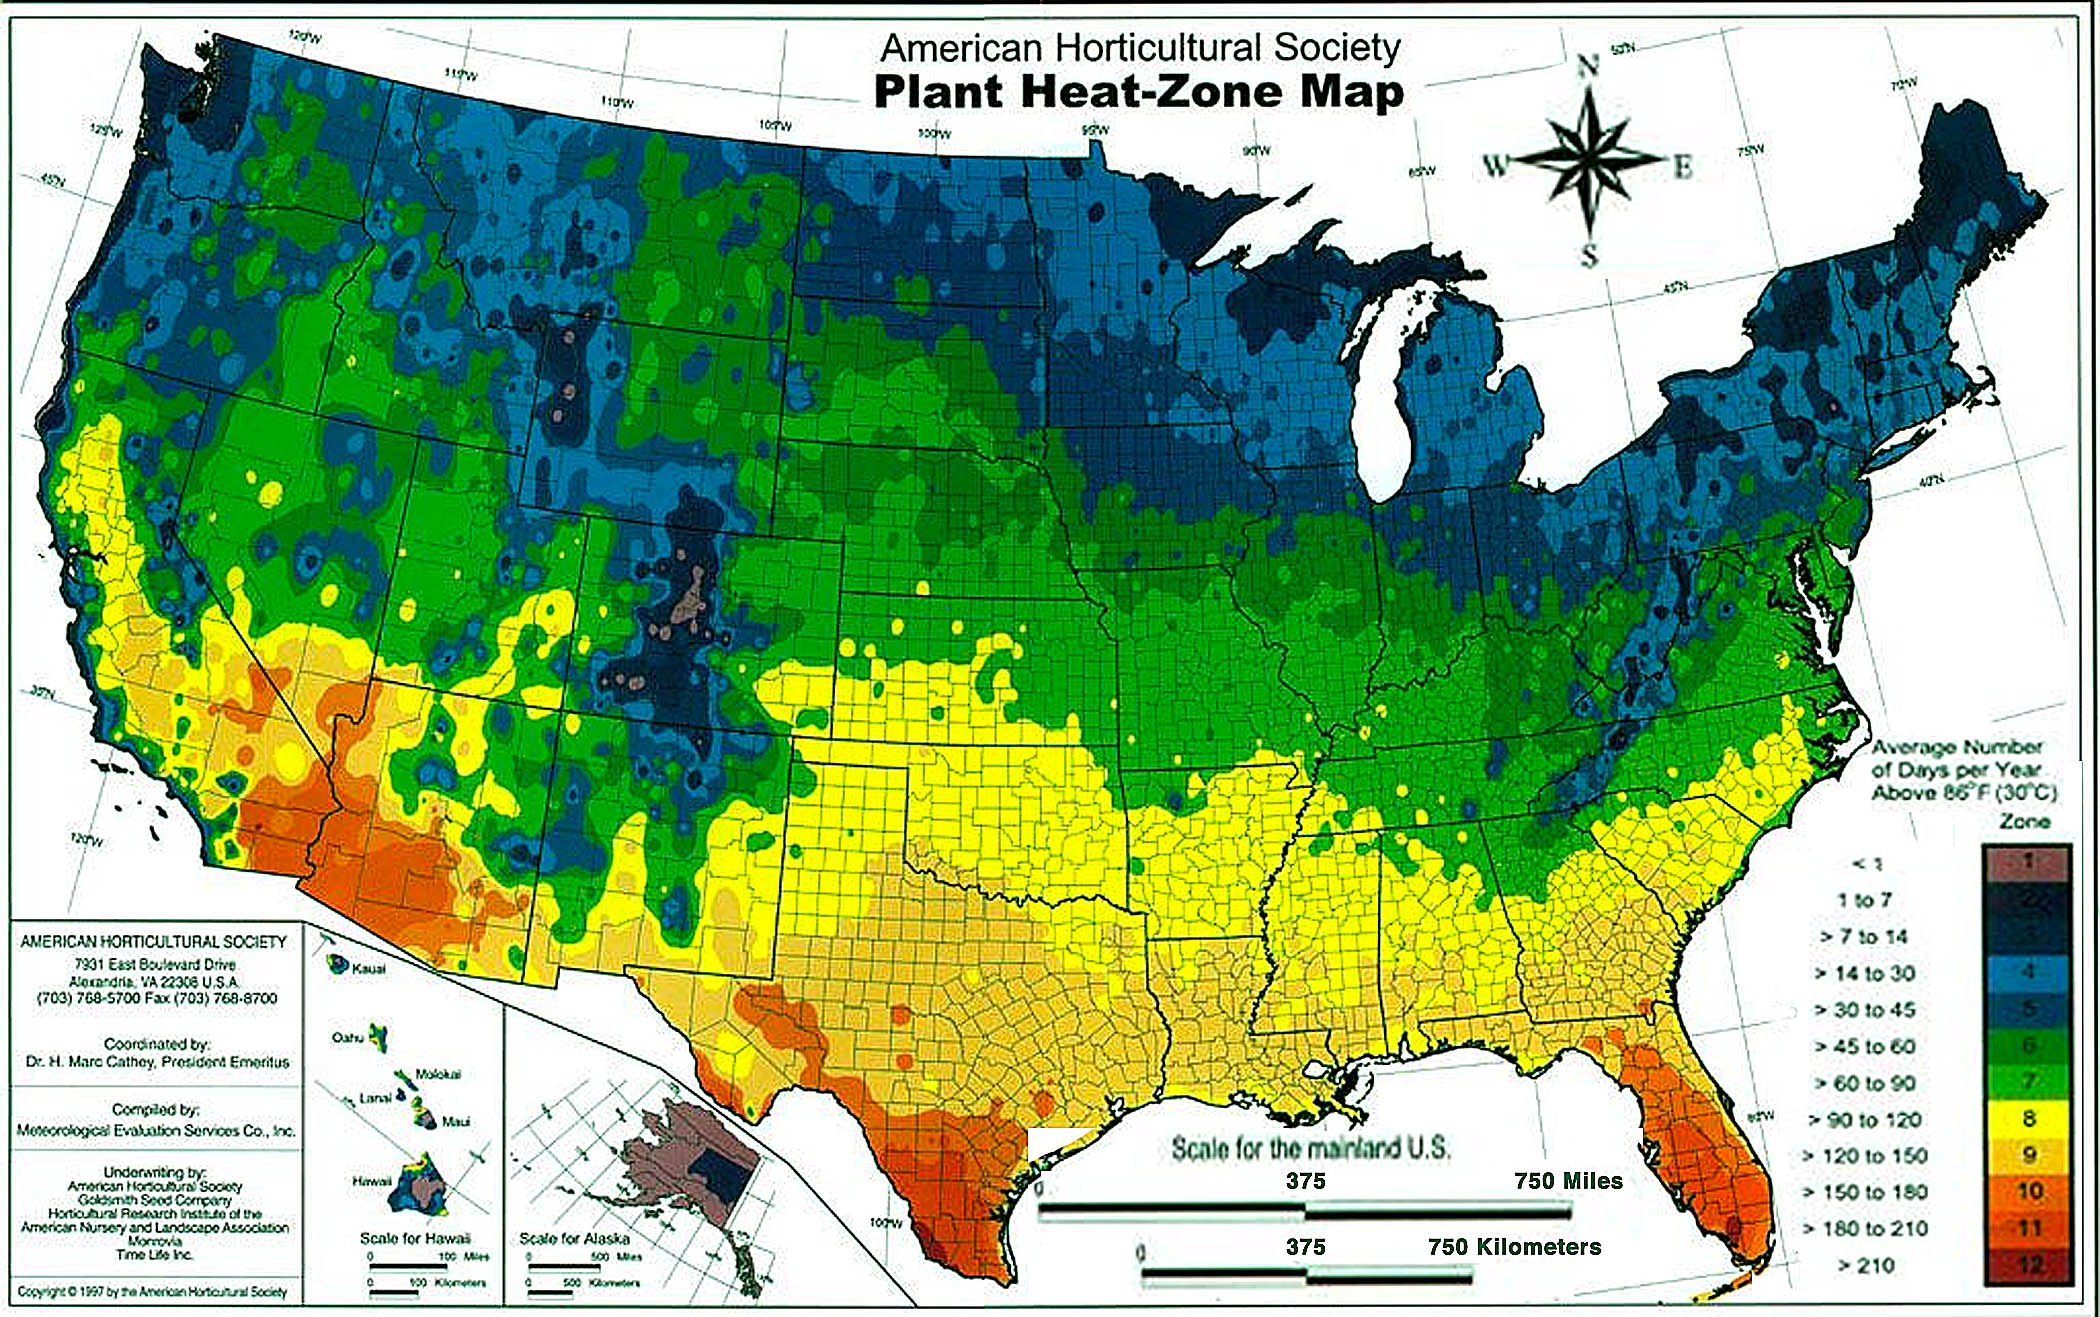
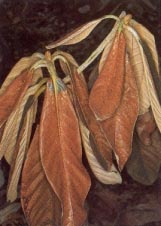
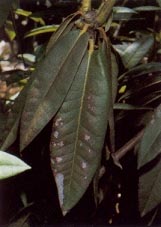

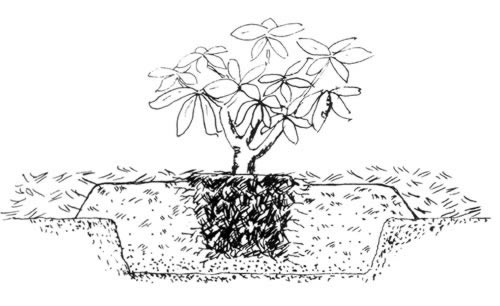
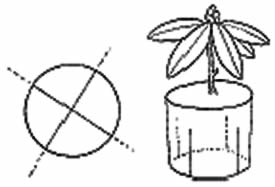

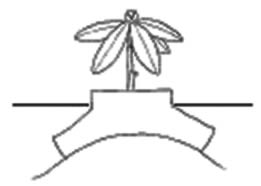
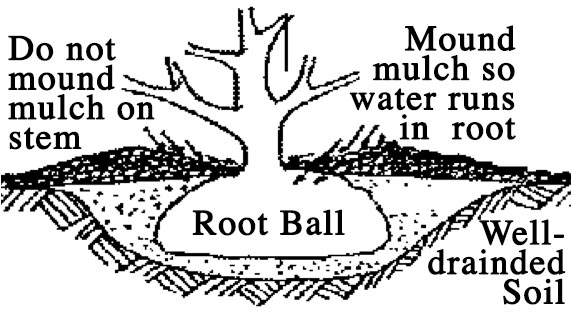
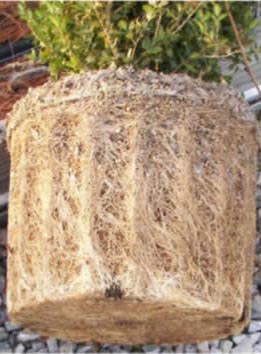
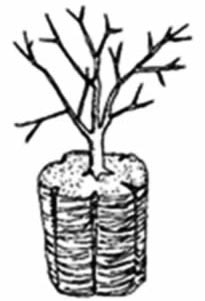
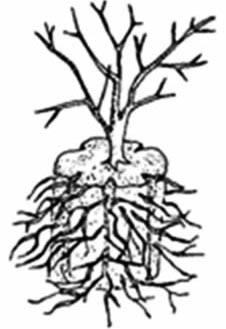
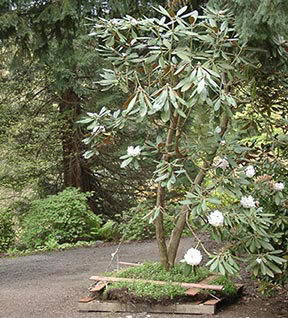
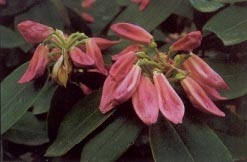
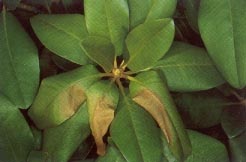

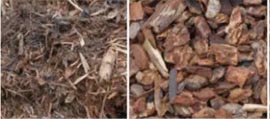
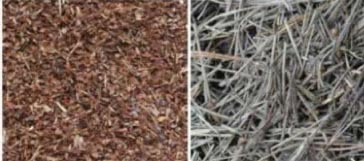
 Repellents should be applied before damage is likely to occur and before deer become accustomed to feeding on the plants.
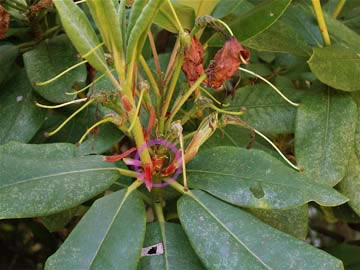
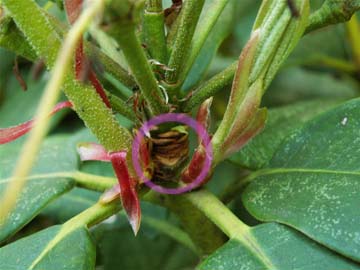
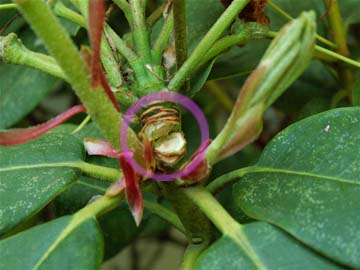
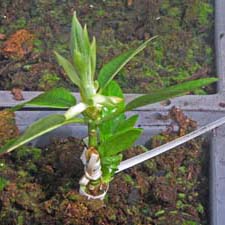
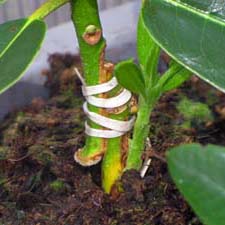
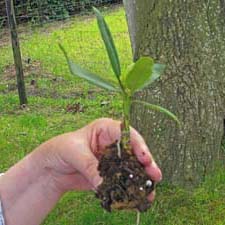
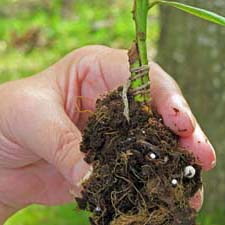
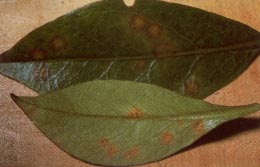
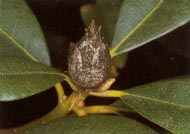
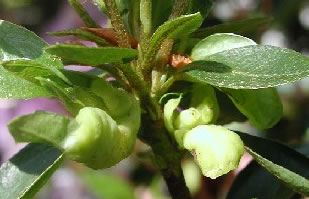
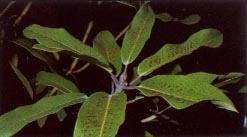
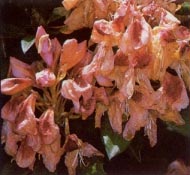
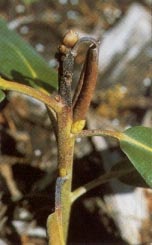
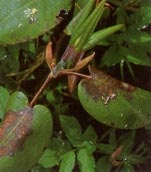
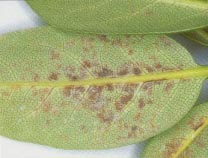
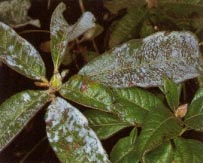
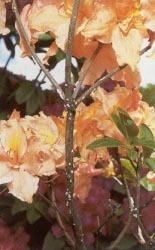
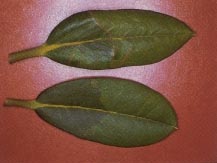

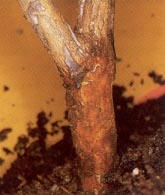
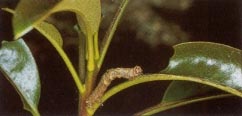
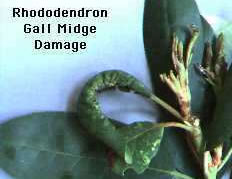
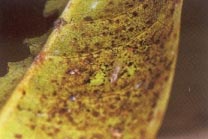
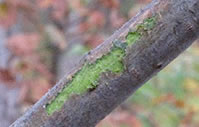
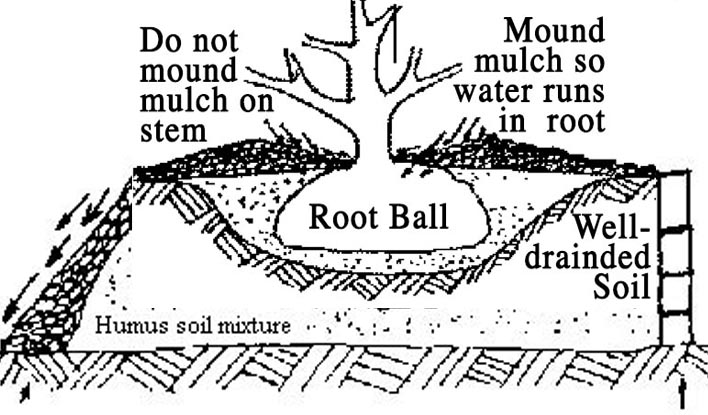 Rhododendrons are easy to transplant most any time. It is best to avoid transplanting when new leaves are coming out or the ground is frozen. If the drainage is OK, then you can keep the area moist with a good mulch layer. Mulches conserve water in the soil, insulate roots against summer heat and winter cold, and discourage weeds. Replenish mulches annually, as needed, to maintain a 3- to 5-inch layer on the soil surface. Keep the mulch about 3" to 4" back from the trunk/stem of the plants to avoid collar rot, bark split, rodent damage and providing shelter for weevils. Mulching does increase the risk of weevil damage. Fine-textured organic mulches such as pine straw or shredded bark are best. Fall leaves are an excellent mulch, except don’t use black walnut or butternut leaves. They have a chemical, juglone, that kills rhododendrons and azaleas. During hot dry weather, it is common to see rhododendron leaves look wilted. It they look wilted in the heat of the day, that is normal. If they look wilted in the morning, that is a sign that the plant is either too dry or dying from being too wet. It should be easy to tell which, but don't assume, check the soil with your finger. During drought periods, it may be necessary to water once in a while. A deep watering when the plant shows signs of dryness is much better than frequent watering. Only water when the plants show signs of being dry.
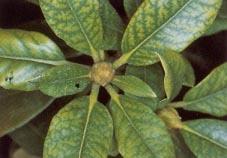
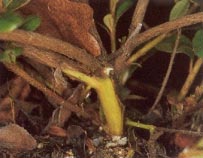
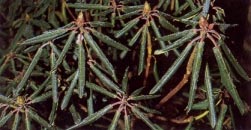
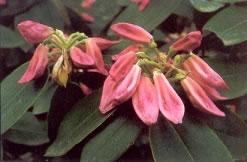
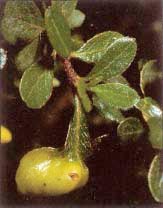
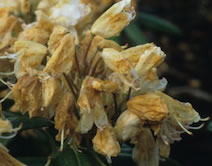
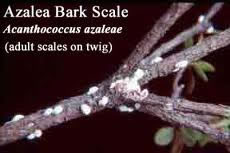
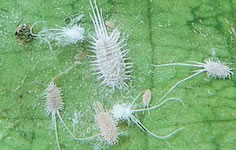
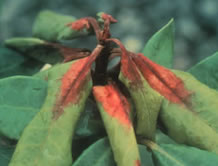
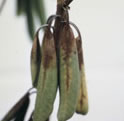

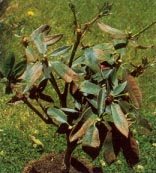
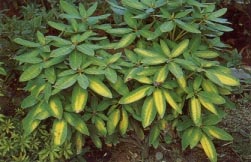
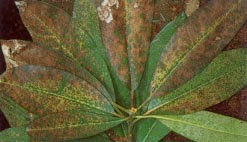 .
.